
 Unaka Gear Co.
Ford Transit Roof Rack - Standard - 148" EXT High Roof
Indexed listing. WNDR Built doesn't sell this product; the button opens unakagearco.com.
Adjustable crossbars for a Transit roof layout
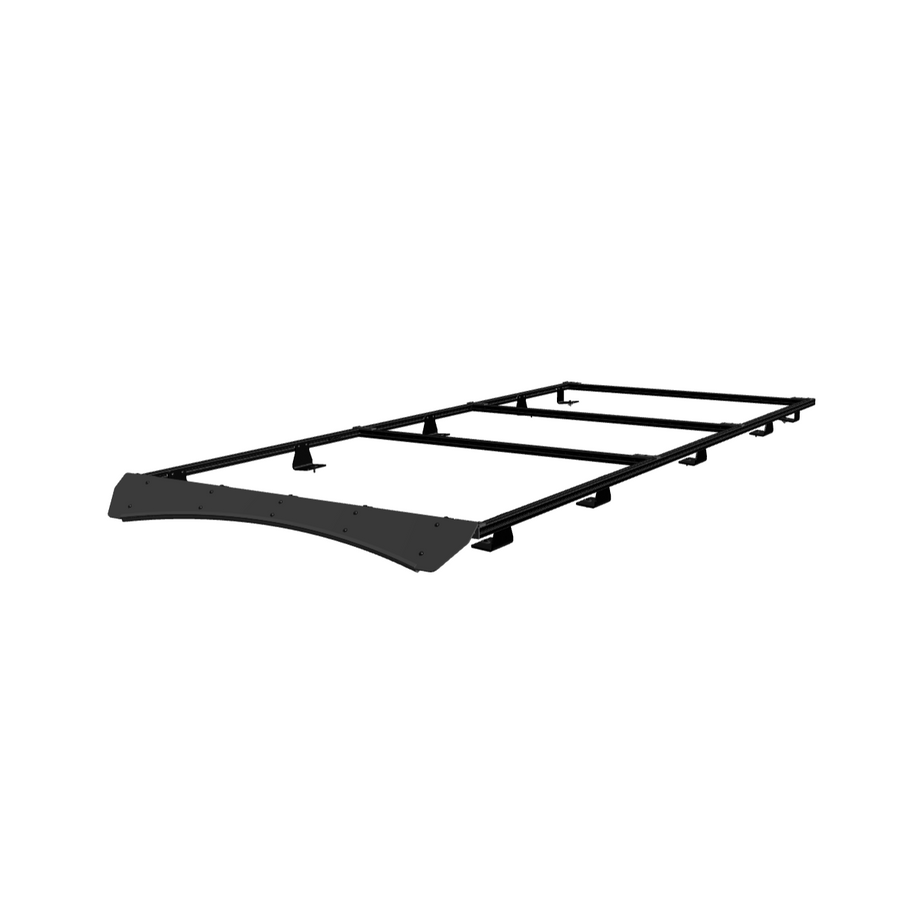
Unaka’s Standard roof rack provides a modular 15-series 8020 aluminum foundation for arranging solar panels and other roof accessories. Its crossbars can move along the side rails, so their positions can be set around the roof layout rather than fixed at preset intervals. The installation manual shows how to shift crossbars to avoid interference with the fixed roof brackets and inside splice plates.
This Standard version pairs the 8020 frame with an acrylic wind fairing and black anodized extrusions. It does not have the aluminum shell, aluminum fairing or light-bar capability described for other versions on Unaka’s shared product page. T-nuts fit into the extrusion channels to attach the crossbars and accessories; the guide calls for adding the needed accessory T-nuts during assembly, before access is obstructed.
Movable crossbars
Crossbars can be repositioned along the side rails to suit the roof layout and avoid bracket or splice-plate interference.
Channel-mounted accessories
The 8020 channels accept T-nuts for solar-panel brackets, awnings, tie-downs and other accessories.
Standard wind fairing
An acrylic wind fairing attaches to the front crossbar through slotted brackets that allow position and angle adjustment.
Manufacturer-listed fitment & checks
Vehicle fitment
As listed by Unaka Gear Co.
- 2015+ Ford Transit · 148" EXT · High Roof
Roof trimming may be required
Check threaded-insert alignment by hand with the supplied M8 bolt; do not force the bolt. If a roof opening is misaligned, the manual calls for trimming it with tin snips and filing or sanding the edges. In rare cases, excess paint inside an insert requires clearing with an M8x1.25 hand tap.
Two people and two ladders
The manual requires two people and two ladders tall enough for the job, on level ground. The unopened single-box kit should also be handled by two people. Unaka strongly recommends installation by a qualified professional or according to its detailed instructions.
Check mounting hardware after installation
The manual requires an initial torque check after 4 to 7 days, a follow-up after 1 month, routine checks every 3 to 4 months, and checks after moderate driving on bumpy or gravel roads.
Installation supplies
Tools and Dicor sealant are not included. Anti-seize for the optional solar-panel bracket installation is also not included.
Antenna clearance
Unaka states the rack is compatible with the new 2026 Transit antenna location.
Solar panel width
Unaka lists a maximum solar-panel width of 60.6". Solar panels are sold separately.
Roof attachment
The manual uses the first, second, third, fifth and rear mounting positions, not the fourth. Rear brackets bolt through the roof with washers and nuts installed from inside the van.
Light bar capability
The Standard model does not have light-bar capability.
Roof load and decks
Unaka’s Transit 8020 guide directs customers to follow the vehicle manufacturer’s roof-load guidelines; exceeding the van roof’s load capacity voids the roof-rack warranty. Unaka does not recommend building a roof deck platform on the van roof.
Specs, parts & installation
Frame and fairing
| Foundation | 15 series 8020 aluminum |
|---|---|
| 8020 finish | Black anodized |
| Wind fairing | Acrylic |
| Installation hardware | Stainless steel |
Crossbars and solar clearance
| Crossbars | 4 ultralight 15 series 8020 crossbars |
|---|---|
| Crossbar extrusion length | 59.63” per the model-specific manual |
| Maximum solar-panel width | 60.6" per Unaka’s product page |
What’s in the box
Rack and wind fairing
8020 roof-rack side rails, four crossbars, acrylic wind fairing and bulb seal.
Rack installation hardware
Roof-rack brackets, wind-fairing brackets, inside splice plates, end caps and stainless steel rack-installation hardware.
Installation at a glance
Use the model-specific Standard 148 Extended WB manual dated 7/1/25.
Assemble the rack on the van’s roof mounting locations; rear brackets require access from inside the van. Seal all four sides of each roof bracket, the hex bolt and sealing washer with Dicor, following Dicor’s instructions.
The manual specifies 132 in-lbs for the final roof/side-rail attachment, fairing-to-crossbar attachment and crossbar-to-side-rail tightening steps; use its separate step-specific settings elsewhere. Do not overtighten the hardware attaching brackets to the acrylic fairing, which can crack. Check all hardware is tight and torqued at completion.
Assembly sequence
- Identify all parts and keep hardware sub-kits separate; some similar parts are not interchangeable.
- Pre-install hardware, assemble the crossbars and fairing, and add T-nuts needed for the fairing, solar panels or other accessories before later assembly blocks access.
- Remove roof-hole covers only at the mounting-pad locations used by the rack. Use a heat gun in constant motion and a plastic scraper, then remove glue and clean with denatured alcohol.
- Check the threaded inserts, loosely install the brackets, join the side rails with splice plates, and position the crossbars to set rail spacing.
- Center and square the rack, tighten and seal the roof brackets, then set final fairing and crossbar positions.
- Install end caps after verifying the side-rail T-nuts are in place; tighten the self-tapping screws only until snug.
Optional solar-panel installation
- The manual lists minimum bracket quantities of 4 for a 150W solar panel or smaller, 8 for a 150W to 250W panel, and 16 for a 300W panel or larger; follow the panel manufacturer’s requirements if it recommends more brackets.
- Use existing panel mounting holes where possible. If adding holes, protect the panel with a ½” or ¾” backer board, center-punch, use an 1/8” pilot and finish with a 5/16” bit; remove drill shavings.
- Orient the bracket’s small slot toward the panel and wide slot toward the 8020, apply anti-seize to the ¼-20 bolt, and slide the bracket inward while tightening.
- The manual specifies 5/16-18 x 9/16” bolts for a single bracket at a T-nut and 5/16-18 x 5/8” bolts when two panels share a T-nut through overlapping brackets; do not interchange these similar-looking bolts.
- Position panels and crossbars before final tightening; follow the manual’s panel-mounting steps and torque settings.
Source notes
- The 7/1/25 Standard 148 Extended WB manual’s parts table lists 16 narrow flush-mount solar brackets and two solar bracket/hardware kits, but pages 15–16 label solar-bracket installation “Sold Separately”; the disputed solar-bracket contents are omitted from this listing’s included-parts list.
- Unaka’s product page promises mounting hardware for two solar panels; the model-specific manual’s conflicting parts table and “Sold Separately” headings are recorded above rather than promising that hardware here.
- The product-linked 6-5-2023 Transit 8020 guide specifies 168 in-lbs for roof-mount M8 bolts and 13 ft-lbs. (156 in-lbs.) for remaining 8020 hardware; this listing follows the newer 7/1/25 model-specific manual’s 132 in-lbs final roof/side-rail and crossbar steps.
- Unaka’s shared product-page compatibility block also lists 2015+ Transit 148 Medium Roof; this listing follows the 148" EXT High Roof title and Standard 148 Extended WB manual.
- Unaka’s FAQ gives a solo Standard-rack installation estimate of 2-3 hours, but the model-specific manual requires two people and two ladders; this listing follows the manual.
- Unaka’s product-page banner advertises free shipping on roof racks to the Lower 48; its Shipping Information page excludes oversized items from free shipping, and its Shipping policy excludes items that ship via LTL freight.
Lead Time
LTL and oversized items exclude free shipping; Route protection is optional; international ordering without a checkout option is described separately on two pages.
Read Unaka Gear Co. lead time policy on WNDR BuiltWarranty
Original purchasers have production-lifetime defect coverage on Unaka-designed and fabricated parts; coatings have up to 180 days, and third-party kit components and wear items are excluded.
Read Unaka Gear Co. warranty policy on WNDR BuiltReturns
Refund policy sections state 30 days from invoice with at least 10% or 20% restocking, versus 15 days from receipt with 15%; RMA required.
Read Unaka Gear Co. returns policy on WNDR BuiltWhat are people saying?
Find owner feedback, discussions, and installation videos for this product.
Searches use the manufacturer and product name and open in a new tab. Results may include similar products.
WNDR Built Community
Our community blog is coming in the future.
Community · Coming soon