
 Flatline Van Co.
Transit Rear Tire Carrier
Indexed listing. WNDR Built doesn't sell this product; the button opens flatlinevanco.com.
A rear-door home for your spare
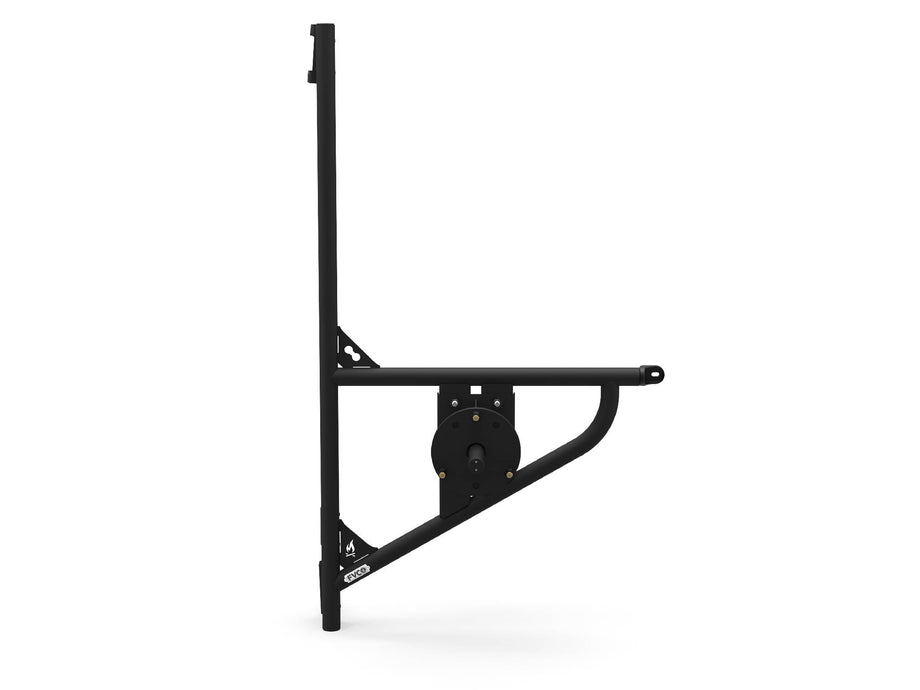
This carrier moves a spare wheel and tire onto the driver-side rear door of a Ford Transit. Flatline Van Co. says relocating the spare this way frees the underfloor space it would otherwise occupy for gray water, fresh water or an auxiliary fuel tank.
The wheel mount comes in short and long versions to suit the wheel. An adjustable lock rod works as a wheel rest, with its depth set for the wheel setup. The guides allow the rod to be left off when using locking lug nuts. A third attachment point uses a silicone damper; Flatline describes its two-direction shock absorption as a way to manage the spare tire's added weight when the door moves.
Aluminum frame
The frame is aluminum tubing with stainless steel structural brackets.
Damped third mount
Flatline says its dual-shock silicone dampener protects the van body from impact during door closure and limits bounce-back momentum.
Locking wheel hardware
The wheel mounts on a wheel bracket with studs, locking conical-seat lug nuts and a lug-nut key.
Manufacturer-listed fitment & checks
Vehicle fitment
As listed by Flatline Van Co.
- 2015+ Transit 150/250/350 | 130"/148"/148" EXT | Mid/High Roof
- 2023-2024 Transit Trail | 148"/148" EXT | Mid/High Roof
Choose your wheel mount
Flatline lists these wheels for each option.
Short Wheel Mount
- Ford Transit Stock 2WD Wheel
- Ford Transit Stock Trail Wheel
- Method 701 & 703 Wheels in 5x160mm bolt pattern
- Black Rhino Sequoia Wheel
- XD 820 Grenade Wheel
Long Wheel Mount
- Ford Transit Stock AWD Wheel
- Ford Transit Stock Dually Wheel
- Method 701 & 703 Wheels in 6x180mm bolt pattern
- Black Rhino Arsenal Wheel
- Owl Talon Wheel
Rear-door opening limit
The installation guides warn that opening the driver-side rear door past 90° can bring the carrier into contact with the van. Use care opening the door past 90°.
Drilling required
Installation requires a front-facing third-mount hole in the driver-side rear door: use a 3/16” pilot bit or similar, enlarge with a 27/64” bit, then deburr and paint the exposed edges. If the door does not already have the side hole, drill it with a 9/32” or similar-sized bit.
Hitch lock — not included
Flatline describes the adjustable lock rod as compatible with a traditional hitch lock. The Long Wheel Mount guide specifies a 5/8” diameter hitch pin lock, such as the CURT 23518, which is not included.
California Proposition 65 warning
Flatline warns that this product can expose you to lead and lead compounds, DEHP and bisphenol A (BPA), known to California to cause cancer and birth defects or other reproductive harm.
Door attachment
Designed to mount to the driver-side rear door hinges; Flatline states it is compatible with both hinge types. It attaches at the upper and lower hinges and at a drilled third mounting point with an internal door brace; a lower frame brace attaches to the door.
Wheel, tire & spacer clearance
Flatline states the carrier fits all Transit wheel and tire sizes. For a lower-offset aftermarket wheel, the included spacer plate may be used for extra clearance. If you are unsure of the wheel/tire setup, the guides direct you to thread the studs into the wheel bracket and test-fit the spare before proceeding. If the tire compresses excessively against the carrier when tightened, use the spacer plate.
Installer requirement
Flatline’s installation guide says that anyone who has no mechanical experience and is not thoroughly familiar with the installation procedures must have the product installed by a professional installer or other qualified person. Flatline also states it always recommends a professional install for any aftermarket accessory.
Before use
Check mounting points and attachments before use, and regularly inspect the product for wear or damage, as required by Flatline’s guides.
Specs, parts & installation
Frame & construction
| Frame | Aluminum tubing with stainless steel structural brackets |
|---|---|
| Hardware | Stainless steel |
| Third mount | Dual-shock silicone dampener |
Wheel mounting hardware
| Wheel studs | 14x1.5, 65mm length; 10.9 grade hardness; black zinc finish |
|---|---|
| Spacer allowance | Flatline states the wheel studs can accept up to a 15mm spacer. |
| Lug nuts | Conical seat locking lug nuts with lug nut key |
| Lock rod | Adjustable wheel rest |
What’s in the box
Carrier & brackets
Tire carrier frame, wheel bracket, frame brace, upper and lower hinge brackets, internal door brace and two backer plates.
Bushing assembly & templates
Bushing cap, tall and short bushings, sealing washer, front and side drill templates, and adjustable lock rod.
Wheel spacer
Machined aluminum spacer plate.
Studs, lug nuts & hardware
Three M14-1.5 X 65 wheel studs, three locking lug nuts, lug nut key, thread locker and mounting hardware.
Installation at a glance
Flatline’s guides list 1-2 hours and suggest additional help for a few steps.
Installation uses hand tools and a power drill; tools are not included. Support the door during hinge removal to prevent twisting, and use assistance to raise the carrier to the door. Read the guide matching your wheel-mount option for the full procedure.
Installation sequence
- Remove the lower door trim panel and peel back the top left corner of the vapor barrier; the removal method depends on the door trim configuration.
- Use the front and side templates to locate the mounting holes. The side-hole center should be about 15.25” from the door latch. Drill as required, then deburr and paint the front-hole edges.
- Attach the wheel bracket to the frame with the two backer plates and carriage bolts. If fitting the adjustable lock rod, set its depth for the wheel and apply Loctite to its fasteners.
- Mark the lower hinge alignment, support the door and remove the three factory hinge bolts. Slide the lower hinge bracket over the hinge, reinstall the bolts snugly, check door clearance, then tighten. Repeat at the upper hinge and test door function.
- With assistance, raise the carrier and attach it loosely to both hinge brackets, keeping its fins inside the brackets. Insert the bushing assembly through the third-mount hole and attach the internal door brace.
- Secure the third mount, operate the door to check for interference, then tighten the hinge-mount fasteners. Attach the lower frame brace to the door.
- Apply Loctite to the short end of each wheel stud and install the studs in the wheel bracket, with the spacer plate if needed. Lift the wheel onto the carrier and tighten the lug nuts with the supplied key and a 13/16” socket.
Tools listed in the guides
- 6MM, 5/32” and 7/32” Allen wrenches; 13MM and 13/16” sockets; 9/16”, 7/16” and 3/4” wrenches; ratchet.
- Power drill; 3/16” and 27/64” bits, plus a 9/32” or similar-sized bit if the side hole is absent; marker, measuring tape and auto panel removal tool.
Source notes
- The Long Wheel Mount guide omits the spacer plate from its package-contents diagram but calls it included in step 6.1; the product page also says it is included.
- The product page lists Method 6x180mm wheels for the Long Wheel Mount and 5x160mm wheels for the Short Wheel Mount; the guides describe un-notched spacer holes for a 5-lug pattern in the Long guide and notched holes for a 6-lug pattern in the Short guide. Spacer-hole mapping is not specified here.
- The product page describes a drill point on each side of the door; both installation guides require the side hole only if the door does not already have it. This listing follows the guides.
Lead Time
In-stock dispatch: 1–2 business days; LTL delivery: typically 7–21 business days; preferred service uses flat rates; economy may be free with longer lead times.
Read Flatline Van Co. lead time policy on WNDR BuiltWarranty
Flatline-made products have a one-year limited warranty for the original purchaser; purchaser-paid claim returns and exclusions apply; other manufacturers’ products carry only their applicable manufacturer warranties.
Read Flatline Van Co. warranty policy on WNDR BuiltReturns
Returns within 30 days of receipt require RMA, unused original-packaged items and 20% restocking; customer-paid shipping unless Flatline error; clearance/garage-sale/final-sale excluded; identified custom/made-to-order exclusions may apply.
Read Flatline Van Co. returns policy on WNDR BuiltWhat are people saying?
Find owner feedback, discussions, and installation videos for this product.
Searches use the manufacturer and product name and open in a new tab. Results may include similar products.
WNDR Built Community
Our community blog is coming in the future.
Community · Coming soon