
 Unaka Gear Co.
Ram ProMaster Roof Rack - Standard - 159" High Roof
Indexed listing. WNDR Built doesn't sell this product; the button opens unakagearco.com.
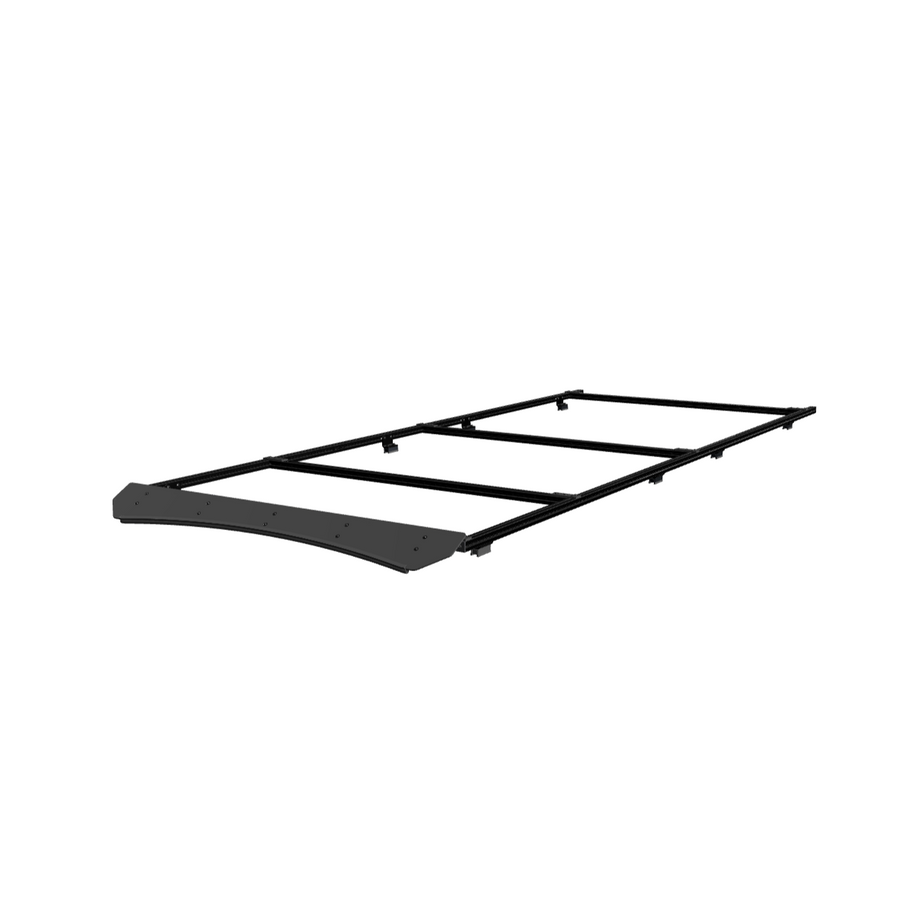
An adjustable frame with an acrylic fairing
The Standard rack is a modular 8020 frame for arranging solar panels and other roof-mounted accessories. Its crossbars can move along the side rails to suit the roof layout, with T-nuts providing the channel connections.
This version pairs black powder-coated aluminum bars with a black acrylic wind fairing. It uses that frame-and-fairing construction rather than the Premium rack’s laser-cut aluminum shell. The rail sections join with internal splice plates, and the front fairing mounts on brackets attached to the front crossbar.
Slotted fairing brackets
Five brackets support the acrylic fairing. Their slots provide slight forward/backward adjustment.
Channel access
T-nuts for solar panels and other accessories can be added through the T-nut cut-out in the crossbars.
Threadlocked hardware
The current Standard manual lists Blue Loctite 242 pre-applied to kit bolts that are not used with nylock nuts.
Manufacturer-listed fitment & checks
Vehicle fitment
As listed by Unaka Gear Co.
- 2014+ Ram ProMaster · 159" · High roof
2025–2026 antenna condition
On 2025 and 2026 Ram ProMaster vans, press the wind fairing’s bulb seal over the antenna during installation so the fairing sits behind the factory marker lights, as required by the product page.
Solar brackets sold separately
Solar panel brackets are not included with Standard roof racks; the product page specifically excludes flush-mount brackets and sells them separately.
Fairing bracket clearance
The fairing brackets must sit directly on the crossbar and must not share a bolt position with a solar panel bracket or similar part; keep each fairing bracket spaced identically to avoid a warped appearance. The REV 2 manual dated 6-9-2026 adds: if an outside fairing bracket lands on the crossbar drop slot, orient that crossbar so the drop slot does not face up.
Installation access
The rack manual requires two people and two sufficiently tall ladders on level ground. The standalone ProMaster bracket guide states that installation should be performed by qualified persons only.
Solar bracket requirements
For flush-mount installation, the manual lists minimums of 4 brackets for a 150W solar panel or smaller, 8 for a 150W to 250W panel, and 16 for 300W and larger; follow the solar panel manufacturer’s requirements if it specifies more brackets. Solar panels are sold separately.
Use terms
Unaka’s Terms & Conditions of Sale states that its parts are intended for off-highway application only; installation may void vehicle warranty coverage.
Vehicle roof-load limit & roof decks
Unaka’s bracket guide requires staying within the vehicle manufacturer’s roof-load limits for the specific model year; exceeding the roof capacity voids roof-rack warranty coverage. It does not recommend roof-deck platforms.
Roof attachment
Requires the van’s OEM roof T-studs. The brackets slide over the T-posts from the outside in and attach through 8020 adapter brackets.
Solar panel width
Unaka’s product page lists a maximum panel width of 59.25".
Crossbar positioning
Crossbars may need to move to avoid interference because the 8020 adapter brackets and inside splice assemblies are not relocatable.
Hardware checks
The rack manual requires an initial torque check after 4 to 7 days, a follow-up after 1 month, routine checks every 3 to 4 months, and checks after moderate driving on bumpy or gravel roads.
Specs, parts & installation
Frame & fairing
| Foundation | 15 series 8020 aluminum |
|---|---|
| 8020 finish | Black powder coat |
| Wind fairing | Black acrylic |
| Crossbars | 4 ultralight 15 series 8020 crossbars |
| Crossbar length | 60.25” — model-specific manual |
What’s in the box
Rack & fairing
Roof rack, black acrylic wind fairing, bulb seal and five fairing brackets.
Crossbars & rail connections
4 ultralight 15 series 8020 crossbars, side rails, inside splice plates, crossbar connectors and end caps.
Mounting hardware
The June 2026 manual lists 4 roof-bracket sets of two and 8 8020 adapters, with rack installation hardware. The product page also lists mounting hardware for two solar panels, while expressly excluding flush-mount solar panel brackets.
Installation at a glance
The model-specific manual requires two people and two ladders.
Unaka’s FAQ estimates 2-3 hours solo for a Standard rack, but the manual’s two-person requirement still applies.
Pre-assemble the hardware, fit the brackets over the factory roof T-posts, and leave the mounting hardware loose until the rails and crossbars are centered, parallel and square. Check and tighten the adapter hardware before solar panels or accessories restrict access.
Use Blue Loctite 242 on bolts not paired with nylock nuts and anti-seize where the manual calls for it; anti-seize is not included.
No tools are included. Do not overtighten hardware through the acrylic fairing, which can crack it. Take extra care not to drop the fairing onto the windshield or front of the van.
Use the matching Standard rack manual, REV 2 dated 6-9-2026. At its final rack-to-roof tightening stage, torque the lock nuts securing the 8020 adapter brackets and side-rail assemblies to the factory channels to 132 in-lbs. Follow that manual’s separate instructions for other fasteners and tightening stages.
Assembly sequence in the model-specific manual
- Lay out the parts and keep sub-kit hardware separate; similar-looking pieces are not interchangeable. Pre-install the selected T-nuts and connectors loosely.
- Prepare the crossbars and mount brackets loosely over the roof T-posts. Slide on the rail sections and join them with inside splice plates, keeping the roof attachment loose for alignment.
- Use at least three crossbars, near the front, middle and rear, to set spacing; add accessory T-nuts before they become difficult to access.
- Center the rack, set both sides to matching positions and make it parallel and square. Tighten the adapter and roof attachment hardware before continuing.
- After alignment, fit the end caps only after the required T-nuts are in the rails; tighten their self-tapping screws snugly without overtightening. The June 2026 manual places this before the final fairing installation.
- Install the acrylic fairing using the current manual’s Item 14 washer callouts; do not overtighten the acrylic hardware. Set final crossbar positions and complete all hardware checks using the matching June 2026 rack manual.
Tools and supplies listed in the manual
- Two ladders, tape measure and a torque wrench covering the manual’s specified fastener torques.
- SAE sockets including ½” and 7/16”; ½” box wrench; 3/16”, 1/8” and 5/32” Allen tools.
- Blue Loctite 242 and anti-seize. Reapply threadlocker if a bolt with Loctite has been fully loosened or loosened repeatedly.
Optional solar panel preparation
- Solar panels are sold separately. Follow the panel maker’s bracket requirements if greater than Unaka’s stated minimums.
- If adding mounting holes, protect the panel with a ½” or ¾” backer board inside it; use a center punch, an 1/8” pilot bit and a 5/16” finishing bit, then remove drill shavings.
- The manual distinguishes the nearly identical 9/16” and 5/8” bracket bolts; use the specified longer bolt when two panel brackets share one T-nut.
Lead Time
LTL and oversized items exclude free shipping; Route protection is optional; international ordering without a checkout option is described separately on two pages.
This product
Unaka’s product page advertises free shipping on roof racks to the Lower 48.
Warranty
Original purchasers have production-lifetime defect coverage on Unaka-designed and fabricated parts; coatings have up to 180 days, and third-party kit components and wear items are excluded.
Read Unaka Gear Co. warranty policy on WNDR BuiltReturns
Refund policy sections state 30 days from invoice with at least 10% or 20% restocking, versus 15 days from receipt with 15%; RMA required.
Read Unaka Gear Co. returns policy on WNDR BuiltWhat are people saying?
Find owner feedback, discussions, and installation videos for this product.
Owner reports
Quotes from owners and installers, with links to where they were posted. These are owner reports, not manufacturer-confirmed information, and may describe a different van or year than yours. Verify before you buy.
Perfect fit and works great for the light bar we had to install for DOT regulations.
View originalSearches use the manufacturer and product name and open in a new tab. Results may include similar products.
WNDR Built Community
Our community blog is coming in the future.
Community · Coming soon