
 Unaka Gear Co.
Mercedes Sprinter Roof Rack - Premium Light Bar - 144" High Roof
Indexed listing. WNDR Built doesn't sell this product; the button opens unakagearco.com.
A Sprinter rack with an integrated light-bar opening
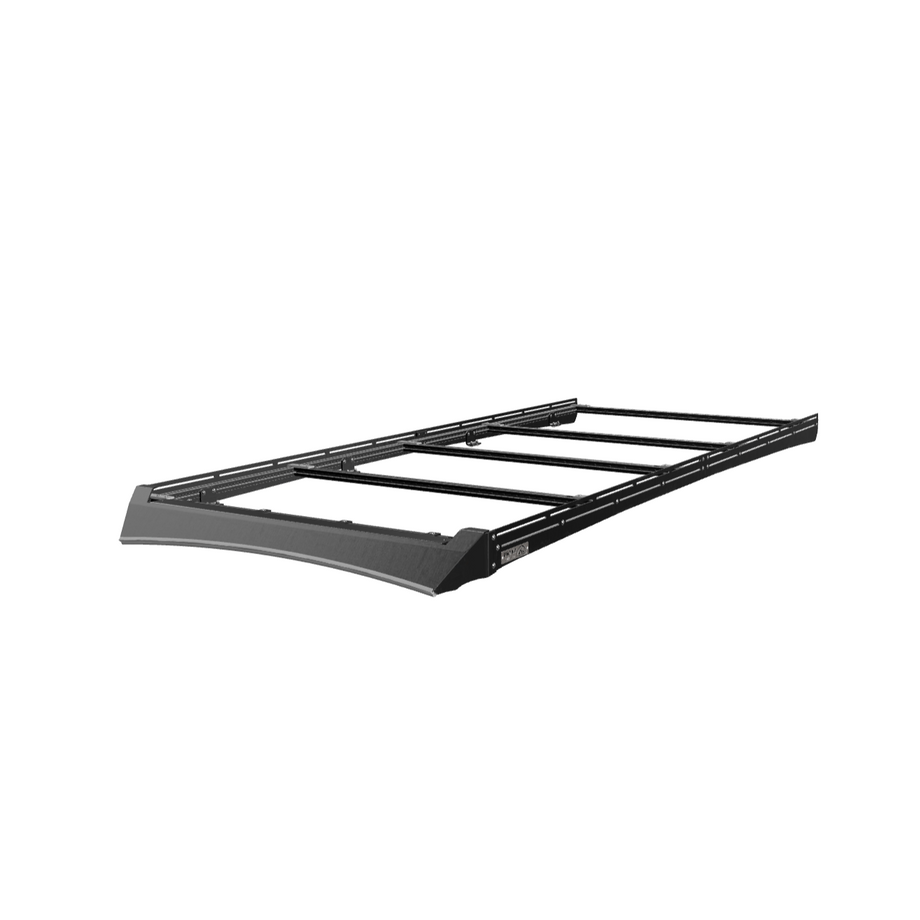
This Premium Light Bar rack combines an adjustable 8020 roof-rack frame with a welded wind fairing cut out for a front light bar. The fairing is shaped to follow the van, with a bulb seal that Unaka says deflects air and protects the paint. Laser-cut aluminum side plates cover the frame’s side rails.
The crossbars have top-access fastening and drop slots for adding T-nuts after installation. This lets the roof layout be adjusted without removing an awning, according to Unaka’s product page. The supplied top-mount solar brackets provide a separate mounting arrangement for panels, while the light bar and its adapter brackets are purchased separately.
Powder-coated frame parts
Unaka states that the powder coat covers both the parts and extrusions.
Welded front fairing
The one-piece wind fairing uses reinforced corners.
Modular crossbar placement
Crossbars can be positioned along the side rails to suit the roof layout.
Manufacturer-listed fitment & checks
Vehicle fitment
As listed by Unaka Gear Co.
2019+ Sprinter High Roof Vans; this listing is the 144" Premium Light Bar rack.
Light bar and adapter brackets not included
The manual states that neither the light bar nor Unaka’s light-bar adapter brackets comes with the rack. A different light bar may require marking and drilling new holes in the wind fairing.
Follow the van roof-load limit
Unaka’s product-page FAQ instructs owners to follow the vehicle manufacturer’s roof-load capacity.
Awning brackets sold separately
Mounting a Fiamma F45s requires Unaka’s separately sold awning brackets.
Optional flush solar mounting
Flush-mount solar brackets are sold separately; the manual requires total panel width to be less than 52.75" for this arrangement.
Solar-panel drilling may be needed
If adding panel holes, use a ½" or ¾" protective backer board behind the flange so the drill cannot pass into the solar panel.
Solar bracket quantity
Follow the solar-panel maker’s higher bracket requirement if applicable. Unaka’s manual lists minimums of 4 brackets for 150W or smaller, 8 for 150W to 250W, and 16 for 300W and larger.
Off-highway use & vehicle warranty
Unaka’s Refund policy, under Terms & Conditions of Sale, states that its parts are intended for off-highway application only and warns that installation may void vehicle warranty coverage.
Required roof rails
Pre-installed roof rails are required. The manual permits OEM or aftermarket rails such as Van Tech and states that its washer plates have been tested with OEM and Van Tech rails.
Light-bar fit
Unaka says the rack fits most light bars up to 50" and names the Tyri Hyperion 48 and Diode Dynamics SS5 CrossLink 8-Pod among the compatible cutout options.
Top-mount solar-panel fit
Unaka’s matching 144 High Roof Light Bar manual specifies 200W and larger panels with a maximum panel length of 55.28”. These panels rest over the top of the 8020 side rails.
Before use & maintenance
Unaka requires an initial torque check after 4 to 7 days, a follow-up after 1 month, checks every 3 to 4 months, and checks after moderate driving on bumpy or gravel roads.
Specs, parts & installation
Frame & fairing
| Frame | 15 series 8020-style aluminum extrusion |
|---|---|
| Shell | Laser-cut aluminum |
| Finish | Powder-coated parts and extrusions |
| Wind fairing | One-piece welded construction with light-bar cutout |
| Crossbars | 5 ultralight 15 series 8020 crossbars |
| Side rails | 4 ultralight 15 series 8020 side rails |
Accessory limits
| Manufacturer-listed light-bar fit | Most light bars up to 50" |
|---|---|
| Top-mount panel length | Unaka’s matching manual: maximum 55.28” for 200W and larger solar panels; panels rest over the side rails. |
| Optional flush-mount panel width | Less than 52.75" |
What’s in the box
Rack structure
Single-piece wind fairing, five ultralight 15 series 8020 crossbars, four ultralight 15 series 8020 side rails, and front and rear laser-cut side plates for each side.
Rack mounting parts
Roof-rack adapter brackets and rail washers, crossbar connectors, internal splice plates, side-rail tapped splice plates, end caps, and black-coated stainless steel hardware.
Solar mounting parts
16 solar-panel top brackets and solar mounting hardware. Solar panels are sold separately; required bracket quantities depend on panel size and the panel maker’s instructions.
Included Allen tools
3/16 T-handle Allen wrench, 1/8 Allen wrench and 5/32 Allen wrench.
Installation at a glance
The manual requires two people and two suitably tall ladders on a level area.
Mount into pre-installed roof rails. Keep the roof-channel fittings loose while assembling and aligning the side rails and crossbars, then tighten only at the manual’s specified stages. Fit any separately purchased light bar to the fairing before completing the fairing installation.
Unaka recommends professional installation or following its detailed manual. Complete a final check that all hardware is tight and torqued.
Rack assembly sequence
- Pre-install selected hardware, loosely assemble the crossbars, then slide the roof brackets into the rail channels.
- Join the side rails with internal splice plates and tighten those set screws to 15 in-lbs. Tighten the rail-to-adapter bolts as specified, but leave the brackets loose in the roof channels while setting rack spacing.
- Roughly position at least three crossbars, center and square the rack, then torque the roof-channel locknuts to 132 in lbs. Check bracket fasteners before solar panels obstruct access.
- Install side plates and any light bar with its separately supplied brackets, then fit the fairing and set final crossbar positions. Complete the final torque check.
- Install the side-rail end caps last, after sliding in the required T-nuts.
Optional top-mount solar installation
- If adding panel holes, use a ½” or ¾” protective backer board inside the panel, a center punch, an 1/8” pilot and a 5/16” final hole; clean up all drill shavings.
- Use 9/16" non-flanged screws for individual solar brackets and 5/8" non-flanged screws when two brackets overlap on one T-nut. Route cables before lowering and securing the panel.
- Use anti-seize on the solar-panel bracket bolts and torque them to 75.2 in-lbs; torque the panel-to-crossbar fasteners to 132 in-lbs as specified in the manual.
Other tools & supplies listed
- Torque wrench (75 to 132 in-lbs), ½" and 7/16" sockets and box wrenches, tape measure, two ladders, and metal clippers or similar.
- Loctite 242 for bolts not paired with nylock nuts; anti-seize for bolts paired with nylock nuts.
Source notes
- Unaka’s product-page Specifications state “Solar ready – supports up to 55.25" wide panels”; its matching Sprinter 144 High Roof Premium Light Bar manual, page 18, specifies a maximum solar-panel length of 55.28” for 200W and larger panels resting over the side rails. This listing follows the manual.
- Unaka’s product-page FAQ estimates roughly 4 hours for one person or about 1.5 hours with two; the matching manual requires two people and two ladders. This listing follows the manual’s installation requirement.
- The matching manual’s component table on page 4 lists two side rail tapped splice plates, but its installation instructions on page 12 describe two on each side and four total. The disputed quantity is omitted.
- The product-page manual link opens a Sprinter 170 High Roof guide; the linked Installation Manuals index supplies the matching Sprinter 144 High Roof Light Bar guide used here.
- Unaka’s Refund policy, Returns section, gives 30 days from invoice and minimum 10% restocking when the customer pays shipping or 20% when forgoing shipping costs; its Terms & Conditions of Sale section gives 15 days from receipt and 15% restocking.
- The product-page banner advertises free shipping on large Unaka products to the Lower 48; Shipping Information excludes oversized items and Shipping policy excludes LTL freight from free shipping.
- Shipping Information invites international customers to contact Unaka if checkout offers no method; Shipping policy says no displayed method means the country is not served.
- Shipping Information disclaims transit-loss or damage responsibility when Route protection is declined; Shipping policy generally disclaims shipping damage responsibility and directs claims to the carrier.
Lead Time
LTL and oversized items exclude free shipping; Route protection is optional; international ordering without a checkout option is described separately on two pages.
This product
Unaka’s product-page banner advertises free shipping on large Unaka products, including roof racks, to the Lower 48.
Warranty
Original purchasers have production-lifetime defect coverage on Unaka-designed and fabricated parts; coatings have up to 180 days, and third-party kit components and wear items are excluded.
Read Unaka Gear Co. warranty policy on WNDR BuiltReturns
Refund policy sections state 30 days from invoice with at least 10% or 20% restocking, versus 15 days from receipt with 15%; RMA required.
Read Unaka Gear Co. returns policy on WNDR BuiltWhat are people saying?
Find owner feedback, discussions, and installation videos for this product.
Searches use the manufacturer and product name and open in a new tab. Results may include similar products.
WNDR Built Community
Our community blog is coming in the future.
Community · Coming soon