
 Flatline Van Co.
Sprinter Van Low Pro Roof Rack | 144" Low Roof
Indexed listing. WNDR Built doesn't sell this product; the button opens flatlinevanco.com.
Movable crossbars on a low-roof Sprinter
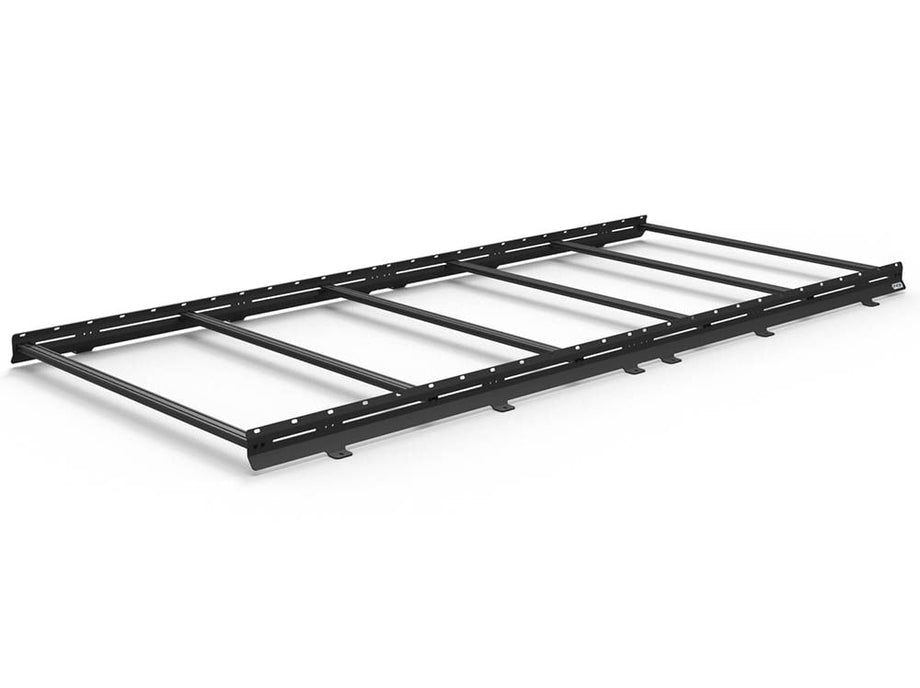
This Low Pro roof rack uses four aluminum side rails and six movable crossbars to carry rooftop accessories on a Sprinter. The crossbars are standard 10 series anodized aluminum extrusions, providing mounting points for solar panels, light bars and other equipment.
Crossbars bolt into paired holes or slots in the side rails and can move forward or backward. This lets the layout leave space around rooftop fans and air conditioners rather than fixing every crossbar in one position.
Roof-track attachment
Rail nuts slide into the van’s roof tracks to secure the side rails.
Mounting hardware
The kit includes stainless steel mounting hardware.
Optional front fairing
Flatline offers a front fairing separately; it is not included with this base rack.
Manufacturer-listed fitment & checks
Vehicle fitment
As listed by Flatline Van Co.
- 2007+ Sprinter 1500/2500/3500/3500XD | 144" | Low Roof
Low Roof only
Flatline says this rack is designed for Low Roof only and will not fit High Roof models.
Fiamma F80S incompatibility
Flatline states this roof rack is not compatible with the Fiamma F80S awning.
Roof rails
Flatline’s FAQ states its Sprinter roof racks (Low Pro, Standard, Safari) require factory or aftermarket roof tracks. The installation guide describes rail nuts sliding into the factory roof rail; the product page calls the supplied track hardware stainless steel pucks.
Front fairing
A front fairing for low roof vans is sold separately and is not included; the guide’s fairing steps apply only if it is purchased with the rack.
Side ladder
The guide says to install two extra rail nuts on the driver side if you are installing a side ladder; a side ladder is not included.
Installer requirement
Flatline’s guide says anyone with no mechanical experience who is not thoroughly familiar with the installation procedures must have the product installed by a professional installer or other qualified person, and that you are responsible for checking the mounting points and attachments before use and inspecting the product regularly for wear or damage.
Specs, parts & installation
Rack construction
| Side rail height | 5 in (Flatline dimensions drawing) |
|---|---|
| Side rails and crossbars | Aluminum; crossbars are 10 series anodized aluminum, quantity 6 |
| Aluminum thickness | Formed 3/16 in aluminum, per Flatline’s comparison chart image |
| Hardware | Stainless steel |
Maker warning
| Maker warning | Flatline’s product warning: This product can expose you to chemicals including lead and lead compounds, DEHP and bisphenol A (BPA), which are known to the State of California to cause cancer and birth defects or other reproductive harm. More information: www.P65Warnings.ca.gov. |
|---|
What’s in the box
Side rails
Four side rails: passenger front, passenger rear, driver front and driver rear
Crossbars
Six crossbars
Rail fasteners
Twelve Sprinter rail nuts, twelve 3/8-16 button head screws with twelve 3/8 Belleville lock washers, twenty-four 1/4-20 flanged button head screws and one threadlocker (guide package and hardware pages)
Product-page hardware description
Flatline’s product page also lists stainless steel pucks for the stock or aftermarket roof tracks and states all hardware is included
Installation at a glance
Flatline’s guide lists 1–2 hours and suggests additional help for a few steps.
Mount the side rails to the roof tracks and position the crossbars around the rooftop layout.
Installation sequence from Flatline’s guide
- Slide half of the rail nuts into the passenger factory roof rail and half into the driver rail, spacing them roughly as in the guide’s layout figure (add two extra on the driver side if you are installing a side ladder). Loosely attach the four side rails to the factory roof rails with the 3/8-16 button head screws and lock washers, starting at the front with the forward rail as far forward as possible. Position the crossbars where you want them and loosely thread in the 1/4-20 flange screws; if a front fairing was purchased, save one crossbar for the fairing assembly. Tighten the crossbar screws with a 3/16 in Allen wrench without overtightening (the guide allows blue threadlocker), then tighten the side rails to the roof rails with a 7/32 in Allen key.
Tools and supplies
- measuring tape, 7/32 in, 3/16 in and 5/32 in Allen wrenches, and a 7/16 in wrench or socket. Tools are not included.
Lead Time
Flatline Van Co.’s FAQ says in-stock items ship within 1-2 business days and shipping is free to the lower 48; its Shipping policy lists flat-rate and economy options, with economy potentially free for longer lead times and typical LTL delivery of 7-21 business days.
Read Flatline Van Co. lead time policy on WNDR BuiltWarranty
One-year limited warranty from the original purchase date for the original purchaser, covering product cost only. It excludes installation, labor and freight, and damage from racing, competition or trail use, and is void for alteration, modification or improper installation.
Read Flatline Van Co. warranty policy on WNDR BuiltReturns
Returns require a pre-authorized RMA within thirty (30) days of receipt, unused items in resalable condition and original packaging; a 20% restocking fee applies and the customer pays return shipping unless Flatline made an error. LTL returns require coordination; clearance, garage-sale and final-sale items cannot be returned, and identified custom or made-to-order items may also be non-returnable.
Read Flatline Van Co. returns policy on WNDR BuiltWhat are people saying?
Find owner feedback, discussions, and installation videos for this product.
Searches use the manufacturer and product name and open in a new tab. Results may include similar products.
WNDR Built Community
Our community blog is coming in the future.
Community · Coming soon