
 Flatline Van Co.
Sprinter Van Standard Roof Rack | 144" High Roof
Indexed listing. WNDR Built doesn't sell this product; the button opens flatlinevanco.com.
An adjustable roof layout with side-ladder access
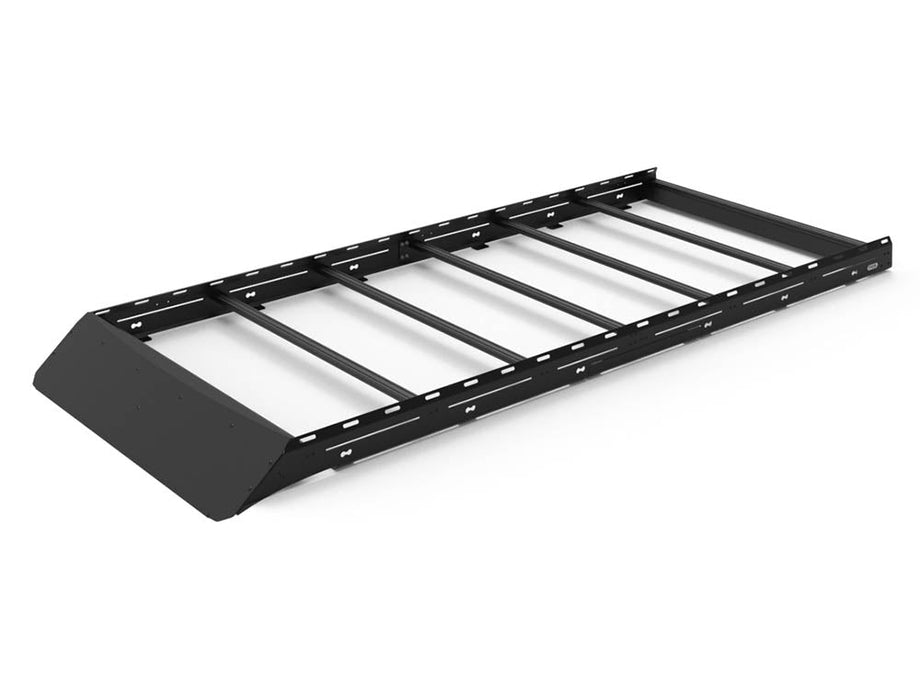
Flatline Van Co.’s Standard Roof Rack uses adjustable aluminum crossbars for arranging rooftop gear around fans, air-conditioning units and solar panels. Drop-in hardware slots provide accessory attachment points along the crossbars.
The side rails are taller than those on the maker’s Low Pro rack. Flatline says that design allows solar panels and other gear to sit recessed between the rails. A built-in front fairing is intended to deflect wind, with a separate fairing style offering a light-bar cutout.
A removable side-ladder hatch can be taken out for ladder access or left in place when no side ladder is used. That access opening is a distinct part of the rack design, separate from the adjustable gear-mounting layout.
L-track attachment points
The side rails have L-track compatible mounting points.
Anodized crossbars
The crossbars use 10 series anodized aluminum extrusion.
Manufacturer-listed fitment & checks
Vehicle fitment
As listed by Flatline Van Co.
2007+ Sprinter 1500/2500/3500/3500XD | 144" | High Roof
Choose your fairing style
Both fairing styles are offered for the 144" High Roof rack.
Normal Fairing
- Standard front fairing
Fairing with 50" Light Bar Cutout
- Choose this option if planning to run a light bar.
- The notched fairing is designed to accept most 50" LED light bars; Flatline recommends the Baja Designs ONX6 50" Arc LED Light Bar.
Light bar — not included
The light-bar fairing option does not include a light bar.
Mounting
Designed to bolt directly to the stock or aftermarket roof rails on the Sprinter 144 High Roof.
Roof tracks
Per the FAQ, Sprinter roof racks (Low Pro, Standard, Safari) require factory or aftermarket roof tracks.
Awning compatibility
Flatline lists the Fiamma F45S and other wall-mount awnings. Its page specifically states that the Fiamma F45S 300 mounts directly to the side rails.
Tent and solar layout
Flatline states that the wider footprint accommodates many roof-top tent models and more solar-panel options.
Installer requirement
Flatline recommends professional installation; if you have no mechanical experience and are not thoroughly familiar with the installation procedures, its guides require a professional installer or other qualified person.
Before use
Properly assemble and secure the product before attaching it to the vehicle; check mounting points and attachments before use, and regularly inspect for wear or damage, as required by Flatline’s guides.
Specs, parts & installation
Frame & construction
| Side rails and crossbars | All-aluminum side rails and crossbars |
|---|---|
| Crossbars | 10 series anodized aluminum, Qty 7 |
| Side rail height | 6.5" tall |
| Hardware | Stainless steel hardware; stainless steel pucks for the stock or aftermarket roof track |
| Fairing | Aluminum front wind fairing |
| Weight | Flatline Van Co. states the total rack weight is 76 pounds. |
Maker warning
| California Proposition 65 | Flatline’s product warning: This product can expose you to chemicals including lead and lead compounds, DEHP and bisphenol A (BPA), which are known to the State of California to cause cancer and birth defects or other reproductive harm. More information: www.P65Warnings.ca.gov. |
|---|
What’s in the box
Rails & crossbars
Four side-rail sections and seven 10 series anodized aluminum crossbars
Access & rear spoiler
Side-ladder access cover and rear spoiler
Selected fairing & fittings
Selected front fairing, driver/passenger and crossbar fairing brackets, gasket trim and coupler plates
Normal Fairing option only: center fairing bracket
Mounting hardware
Stainless steel roof-track pucks and hardware, plus threadlocker
Installation at a glance
Both fairing manuals estimate 1–2 hours and suggest additional help for some steps.
Flatline Van Co. supplies the rack flat packed.
Bolt the side rails to the roof tracks, join the rails with coupler plates, position the crossbars and fit the selected fairing and rear spoiler.
Use the linked Normal Fairing or Light Bar Fairing guide for the selected option.
Installation sequence from the guides
- Slide six rail nuts into the passenger-side roof track and eight into the driver-side track; the extra two are for the side ladder or its access cover.
- Loosely attach the side rails and coupler plates; if no side ladder is being installed, fit the side-ladder access cover.
- Position the crossbars around the rooftop equipment using the fixed holes or slots, saving a crossbar for the front fairing assembly.
- Assemble the selected front fairing and its brackets, with the gasket’s bulbed side inward. The center fairing bracket is used only for the Normal Fairing option.
- Fit the front fairing assembly and rear spoiler/crossbar assembly, then tighten crossbar, roof-track and rail-connecting fasteners; the guides warn against overtightening the crossbar bolts.
Tools listed in both fairing guides
- Required tools, not included: measuring tape, 7/32-inch, 3/16-inch and 5/32-inch Allen wrenches, and a 7/16-inch wrench or socket.
Lead Time
Flatline’s FAQ lists 1-2 business days for in-stock dispatch and free shipping to the lower 48; its Shipping policy instead sets rates and options at checkout, says free economy shipping may mean longer lead times, and lists typical LTL delivery at 7-21 business days.
This product
Flatline’s product page states that in-stock Standard Racks ship out by the next business day and domestic orders are delivered for free.
Warranty
Flatline’s one-year limited warranty from purchase covers material/workmanship defects for the original purchaser and product cost only, excluding installation, labor, freight and racing/competition/trail-use damage; alteration, modification or improper installation voids coverage.
Read Flatline Van Co. warranty policy on WNDR BuiltReturns
Unused items in resalable Grade A condition and original packaging may be returned within 30 days of receipt with prior RMA authorization, subject to a 20% restocking fee and customer-paid return shipping unless Flatline made the error; freight returns require coordination, clearance/garage-sale/final-sale items are excluded, and identified custom or made-to-order items may also be non-returnable.
Read Flatline Van Co. returns policy on WNDR BuiltWhat are people saying?
Find owner feedback, discussions, and installation videos for this product.
Owner reports
Quotes from owners and installers, with links to where they were posted. These are owner reports, not manufacturer-confirmed information, and may describe a different van or year than yours. Verify before you buy.
The instructions for assembling the fairing were confusing for me.
View originalOne other note, the included bolts for mounting the awning brackets to the rack are way too long for this application.
View originalDrill the mounting holes for the brackets and screw on the brackets to the awning on the ground. Then mount the whole assembly to the van.
View originalSearches use the manufacturer and product name and open in a new tab. Results may include similar products.
WNDR Built Community
Our community blog is coming in the future.
Community · Coming soon