
 Vanspeed
Sprinter Scout Side Steps
Indexed listing. WNDR Built doesn't sell this product; the button opens thevanmart.com.
A low-profile step system for Sprinter entry
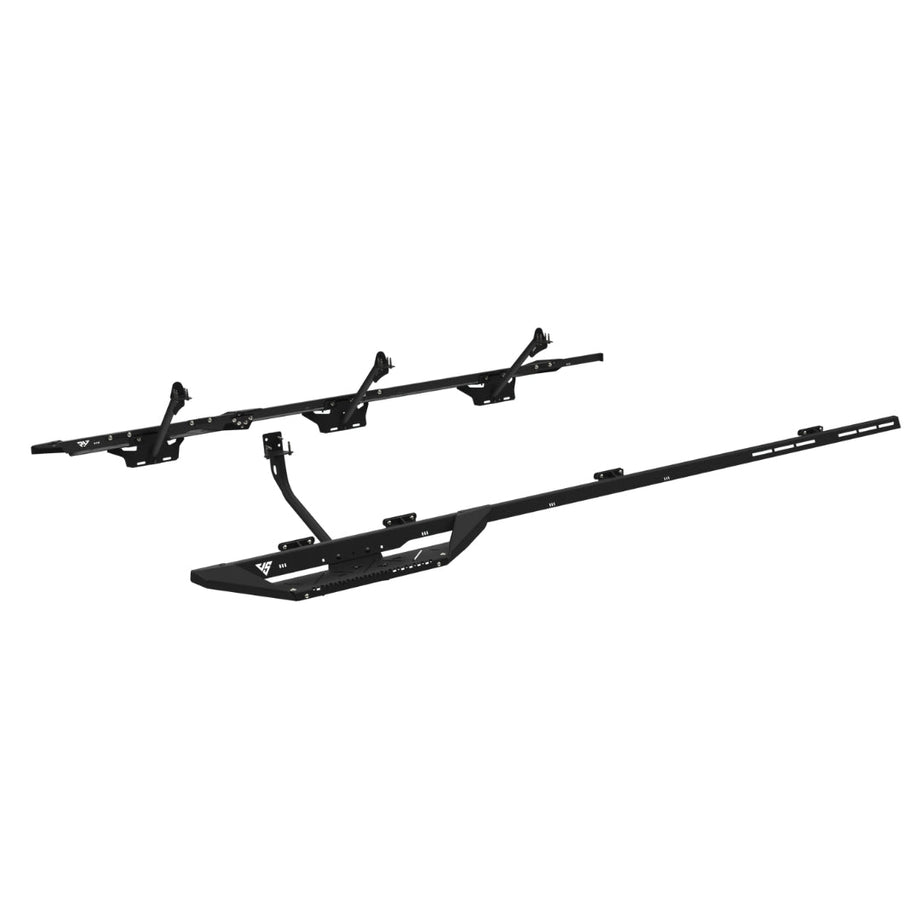
The Sprinter Scout Side Steps put dedicated stepping surfaces at the front doors and passenger sliding door. Their low-profile shape places the steps close to the van body, while a perforated pattern provides a defined footing surface for getting in and out.
The assembly uses separate platforms, toe kicks, rocker brackets and tube supports. Slotted connections let the installer adjust the step layout for wheel-well clearance, and the supports can be positioned around other underbody components before fastening.
Perforated stepping surface
Vanspeed describes the perforated detail as providing extra traction.
Domestic manufacture
Made in Huntington Beach, CA.
Manufacturer-listed fitment & checks
Vehicle fitment
As listed by Vanspeed
2008+ Mercedes Sprinter 144" & 170"; the maker’s Fitment tab specifies high and mid-roof vans.
Choose the extra support option
The maker offers the kit with or without an additional curved tube support.
Without Extra Curved Tube Support
- Option without the additional curved tube support.
With Extra Curved Tube Support
- Required if your van has BOTH factory AC and an AUX Heater.
- Watch the maker’s installation video at 9:50 for potential obstructions and the additional curved-support requirement.
2008–2012 DEF-tank check
For 2008-2012 models, check under the passenger rear cargo area for the old DEF-tank location. These steps will NOT work on models with the tank there.
Drilling required
The maker specifies minor drilling. The Sprinter Scout guide calls for pinch-seam holes worked up to an 11/32” bit and drilling screws to secure tube supports to the underbody frame rail.
Installer experience
Professional installation is recommended if unfamiliar with vehicle mounting hardware or working underneath the van.
Mounting clearance
Confirm clearance for other exterior components and position the tube supports around installed underbody equipment. If front mud guards are installed, follow the guide’s 11” distance from the front of the pinch seam to the front edge of the first tape strip.
Specs, parts & installation
Construction & rating
| Material | Heavy-gauge steel, as stated in the product FAQ |
|---|---|
| Load rating | Vanspeed states the steps are capable of supporting up to 350 lbs. |
What’s in the box
Platforms & toe kicks
Front driver step platform, passenger step platform, sliding-door step platform, two front-step toe kicks and one sliding-door toe kick.
Rocker brackets & connectors
Front driver, front passenger, rear driver and rear passenger rocker brackets; two joint plates and eight flat backing plates.
Tube supports & brackets
Two front-door tube-support brackets, two sliding-door tube-support brackets, one curved tube support and three straight tube supports in the guide’s standard kit.
Hardware
Button head bolts, carriage bolts, stainless washers, nylon lock nuts, serrated flange nuts and drilling screws.
Installation at a glance
The maker lists a typical installation time of 3-4 hours.
Preassemble the platforms and brackets, position them at the pinch seam, then bolt them on and secure the tube supports. The product page says welding is not required.
Tools listed in the Sprinter Scout guide
- 5/32” and 3/16” Hex Drive Allen Keys
- 7/16” and 1/2” Wrenches
- 7/16” Deep-well Socket and 3/8” Drive Ratchet
- 3/8” Drive Extension (6”L), optional
- Cordless Impact Wrench with 3/8” Drive Adapter and 3/8” Hex Socket
- Cordless Drill with Center Punch Bit and 11/32” Bit
- Permanent Marker, Masking Tape and Measuring Tape
Assembly sequence from the Sprinter Scout guide
- Preassemble the toe kicks, platforms, rocker brackets, support brackets and joint plates; leave adjustment where the guide directs.
- Mark the pinch-seam mounting positions using the guide’s placement diagrams, preserving the specified spacing.
- An optional mock-up checks that the steps do not overhang into the wheel wells.
- After the holes are prepared, bolt the driver-side parts to the pinch seam with flat backing plates and connect the joint plate.
- Position and fasten the curved tube support on the driver side; tighten the driver-side hardware before proceeding.
- Repeat on the passenger side using the three straight tube supports, joining the front passenger step to the sliding-door step.
Lead Time
The Shipping policy lists order processing within 2 to 4 business days; shipping time varies with inventory and backorders.
Read Vanspeed lead time policy on WNDR BuiltWarranty
Read Vanspeed warranty policy on WNDR BuiltReturns
Returns within 30 days of purchase carry a 20% restocking fee; the Refund policy waives it for gift-card refunds.
Read Vanspeed returns policy on WNDR BuiltWhat are people saying?
Find owner feedback, discussions, and installation videos for this product.
Searches use the manufacturer and product name and open in a new tab. Results may include similar products.
WNDR Built Community
Our community blog is coming in the future.
Community · Coming soon