
 RB Components
170 Roof Rack w/2 Vents and Full Center Panel
Indexed listing. WNDR Built doesn't sell this product; the button opens rbcomponents.com.
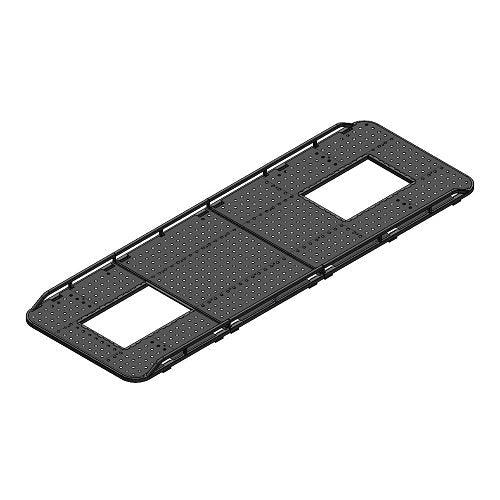
Two vent openings with a full center panel
This RB Components rack combines two roof-vent openings with a full center panel. The layout is intended for factory-location roof vents, with an aluminum platform formed from modular, hand-welded sections.
The sections bolt together during assembly and attach to the van through roof-rail mounting brackets. Optional front and rear vent filler panels let the vent openings be covered. The built-in wire chase and dimpled top panel are distinct features of this rack’s design.
Dimpled top panel
RB Components describes the 1" dimple die top-panel pattern as non-slip.
Built-in wire chase
The rack incorporates a built-in wire chase.
Optional filler panels
RB Components offers optional vent filler panels for the front and rear.
Manufacturer-listed fitment & checks
Vehicle fitment
As listed by RB Components
Mercedes Sprinter 170 High Roof Vans ONLY.
OEM roof rails required
Mounts to Mercedes OEM factory roof rails; roof rails are not included.
Optional vent covers require drilling and riveting
RB Components’ assembly guide describes a separately sold roof vent cover for a van with one or no roof vents. The cover is drilled and riveted into place, with its mounting hardware provided.
Roof vent locations
Fits factory-location roof vents.
Specs, parts & installation
Rack construction
| Material | Aluminum |
|---|---|
| Construction | Hand welded; modular sections |
| Profile | Low profile |
| Top panel | 1" dimple die pattern, described by RB Components as non-slip |
| Made in | U.S.A. |
What’s in the box
Rack sections
Modular roof rack sections.
Assembly and roof-rail mounting hardware
Assembly hardware and roof-rail mounting hardware, including threaded mounting plates, bolts and washers; the assembly procedure also uses locknuts.
Installation at a glance
The assembly guide calls for help lifting the rack onto the van.
Read the complete guide before starting. Bolt the rack sections together, align the roof-rail slides with the mounting brackets, and secure every mounting point with the supplied hardware and medium-strength thread locker.
Tools listed in the assembly guide
- 3/16” Allen Wrench
- 1/2” Socket Wrench w/6” extension
- Medium strength liquid thread locker
Assembly and mounting sequence
- Unpack the rack sections and turn them over to bolt the sections together as shown in the guide.
- Slide 5 roof-rail slides per side into the rails before lifting the assembled rack. For 170 and 170 EXT racks, the 4 extra slides and assembly hardware are in the middle rack box.
- With help, lift the rack onto the factory roof rails and align the mounting brackets with the slides.
- Secure all mounting points with the specified hex-head bolts and washers, applying a small amount of medium-strength thread locker to each bolt.
- For 170 and 170 EXT racks, repeat the rear-rack assembly and installation as directed in the guide; the front-to-middle hardware is packed with the front rack and the middle-to-rear hardware with the middle rack.
Lead Time
Read RB Components lead time policy on WNDR BuiltWarranty
Read RB Components warranty policy on WNDR BuiltReturns
Unused returns within 30 days of purchase; 10% restocking and customer-paid shipping; postmark within 30 days after approval.
Read RB Components returns policy on WNDR BuiltWhat are people saying?
Find owner feedback, discussions, and installation videos for this product.
Searches use the manufacturer and product name and open in a new tab. Results may include similar products.
WNDR Built Community
Our community blog is coming in the future.
Community · Coming soon