
 Flatline Van Co.
Promaster Rear Tire Carrier
Indexed listing. WNDR Built doesn't sell this product; the button opens flatlinevanco.com.
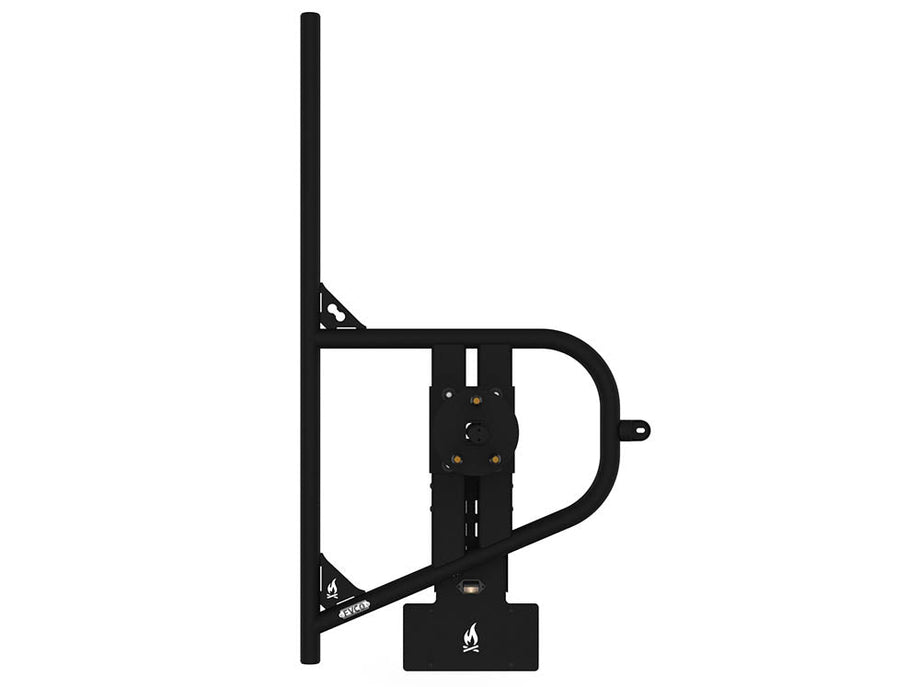
A rear-door mount for your spare
This rear-door spare tire carrier moves the spare out from under the van. Flatline Van Co. says that frees underfloor space for water tanks or auxiliary fuel tanks and makes the spare easier to reach.
The aluminum tube frame connects to the factory hinges through stainless steel brackets. A third mounting point uses a dual-shock silicone damper, which Flatline says absorbs impact in both directions to protect the door. A limit strap and retraction bungee control how far the door opens.
The wheel bolts onto a studded bracket. An included adjustable lock rod can be used with a hitch pin lock sold separately. The kit also relocates the license plate and provides an LED plate light.
Wheel security options
The guide allows the lock rod to be left off when using locking lug nuts.
License plate wiring
The relocation bracket has slots for securing the light wiring with zip ties.
Manufacturer-listed fitment & checks
Vehicle fitment
As listed by Flatline Van Co.
2014+ Promaster 1500/2500/3500 | 136"/159"/159" EXT | High Roof, as Flatline states it.
Door trim, drilling and wiring
The guide has you remove the lower interior door panel trim and drill the outer rear driver door at a templated third-mount location and a separate wiring clearance hole for the license plate relocation bracket. The LED light must be wired in parallel with the factory license plate light harness.
Hitch lock — not included
The lock rod accommodates a 5/8” diameter hitch pin lock, such as the CURT 23518 (not included).
Rear windows
The guide says to use extreme caution around factory rear windows while mounting the carrier into position.
LED bulb warning
The guide notes that LED lights have a lower resistance than factory incandescent bulbs, so some vehicles may display a bulb out warning on the dash; it says installing an appropriate load resistor (not included) typically resolves this.
Door position
Flatline says it is designed to mount to the driver side rear door hinges; the guide installs on the rear driver-side door.
Tire size
Flatline says it fits up to 245/70/R16 or equivalent.
Wheel bolt pattern
Flatline says the adjustable lock rod accommodates different wheel sizes and wheel lug patterns. The guide notes that the notched stud locations of the wheel bracket are for the 5x130 bolt pattern.
Optional add-on
Flatline’s product form offers an optional Tire Carrier RotoPax Adapter, selected separately on Flatline’s website.
Installer requirement
Flatline’s guide says anyone with no mechanical experience who is not thoroughly familiar with the installation procedures must have the product installed by a professional installer or other qualified person, and that you are responsible for checking the mounting points and attachments before use and inspecting the product regularly.
Specs, parts & installation
Frame & mounting
| Frame | 1.75” aluminum round tube and 3/16” formed aluminum, per Flatline. |
|---|---|
| Hinge brackets | Stainless steel, per Flatline. |
| Door damper | Dual-shock silicone damper at the third mount, per Flatline. |
Wheel hardware
| Wheel studs | The installation guide lists M14-1.5 X 65 WHEEL STUD (QTY: 3). Flatline’s product page specifies 10.9 hardness and a zinc yellow chromate finish. |
|---|---|
| Lug nuts | Conical-seat locking lug nuts and lug nut key included, per Flatline. |
Maker warning
| California Proposition 65 | Flatline’s product warning: This product can expose you to chemicals including lead and lead compounds, DEHP and bisphenol A (BPA), which are known to the State of California to cause cancer and birth defects or other reproductive harm. More information: www.P65Warnings.ca.gov. |
|---|
What’s in the box
Carrier & wheel mount
Tire carrier frame, wheel bracket, lock rod and frame brace.
Door mounting & travel control
Upper and lower hinge brackets, two backer plates, third mount with bushings, and limit strap assembly with retraction bungee.
Wheel hardware
Three M14-1.5 X 65 wheel studs, conical-seat locking lug nuts and lug nut key.
License plate & accessories
License plate relocation kit with LED light; bottle opener and drill template.
Mounting hardware
Carriage bolts, flanged and button head screws, locknuts, washers and threadlocker, as listed in the guide.
Installation at a glance
The guide lists 1–2 hours and suggests additional help for a few steps.
Installation requires door-panel removal, drilling, hinge-bracket fitting and license plate light wiring.
Support the door during hinge removal; do not use power tools on the factory hinge bolts. Check door clearance and operation before final tightening. Tools are not included.
Installation sequence from the guide
- Remove the lower interior door panel trim (each door configuration needs its own removal method).
- Use the front drill template to mark the outer rear driver door, aligned to the van body’s sheet metal and not the plastic license plate cover trim. Keep the template tight against the van body. Drill a 3/16” pilot hole and enlarge it with a 27/64” bit.
- Debur and paint the exposed edges with rust preventative paint. Drill a 1/4” clearance hole for the license plate relocation bracket wiring, taking care not to drill through the plastic housing that holds the license plate light.
- Assemble the wheel bracket and the optional lock rod, then attach the license plate relocation bracket. The lock rod depth adjusts to the wheel setup; its installation may be skipped with locking lug nuts.
- Mark the factory hinge alignment. Install the lower and upper hinge brackets one hinge at a time, supporting the door and reusing the factory bolts. Check clearance before tightening, and test door operation.
- Install the third mount with the bungee bracket oriented as shown in the guide. With assistance, raise the carrier into position; its fins go inside the hinge brackets. Secure the bushing assembly and lower frame brace, check door clearance and tighten the hinge-mount fasteners.
- Install the limit strap bracket and webbing guide. Keep the middle webbing loop facing inward for the bungee. Tie the retraction bungee through that loop at about 14” long using a figure-eight knot or similar, then run it through the bungee bracket, pull tight and tie an overhand knot.
- Apply Loctite to the short ends of the wheel studs and screw them into the wheel bracket with a 6MM Allen wrench. Lift the wheel onto the carrier and fasten the lug nuts with the supplied key and a 13/16” socket.
- Attach the bottle opener to the third-mount bracket.
- Splice the LED light into the factory plate-light harness in parallel: white to red and black to black. The guide recommends silicone around the drilled wire hole to keep moisture and debris out of the door cavity.
Tools and supplies listed in the guide
- Auto panel removal tool, painter’s tape, measuring tape, marker, power drill, 3/16”, 27/64” and 1/4” drill bits, debur tool and rust preventative paint.
- 3/4”, 9/16” and 13/16” wrenches/sockets; 5/32”, 7/32”, 4MM and 6MM Allen wrenches; 5MM wrench/socket; T40 Torx and flathead screwdriver.
Source notes
- Flatline Van Co.’s installation guide, page 4, lists M14-1.5 X 65 wheel studs; its product page lists 68mm length. This listing follows the guide.
- Flatline Van Co.’s installation guide gives 1–2 hours and requires a drill; its product page says an hour with only basic hand tools. This listing follows the guide.
- Flatline Van Co.’s guide hardware table lists 1/4-20 X 0.75 flanged button head screws; step 4.3 specifies 1/4-20 X 0.5 for the license plate bracket. The disputed screw length is omitted from this listing.
- Flatline Van Co.’s guide hardware table lists 1/2-13 X 1.5 square neck carriage bolts; step 5.6 specifies a 3/8” carriage bolt for the third mount. The disputed third-mount bolt size is omitted from this listing.
Lead Time
In-stock dispatch: 1–2 business days; LTL delivery: typically 7–21 business days; preferred service uses flat rates; economy may be free with longer lead times.
Read Flatline Van Co. lead time policy on WNDR BuiltWarranty
Flatline-made products have a one-year limited warranty for the original purchaser; purchaser-paid claim returns and exclusions apply; other manufacturers’ products carry only their applicable manufacturer warranties.
Read Flatline Van Co. warranty policy on WNDR BuiltReturns
Returns within 30 days of receipt require RMA, unused original-packaged items and 20% restocking; customer-paid shipping unless Flatline error; clearance/garage-sale/final-sale excluded; identified custom/made-to-order exclusions may apply.
Read Flatline Van Co. returns policy on WNDR BuiltWhat are people saying?
Find owner feedback, discussions, and installation videos for this product.
Searches use the manufacturer and product name and open in a new tab. Results may include similar products.
WNDR Built Community
Our community blog is coming in the future.
Community · Coming soon