
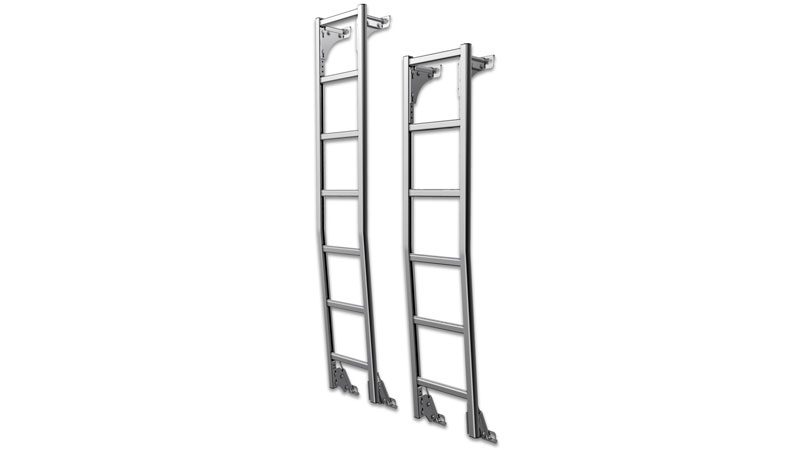
REAR DOOR ACCESS LADDER FOR FORD TRANSIT HIGH ROOF [H3]
Indexed listing. WNDR Built doesn't sell this product; the button opens primedesign.net.
Rear-door access with door-edge brackets
Prime Design’s Rear Door Access Ladder provides a climbing route on the van’s rear door. Upper brackets hang over the top door edge, while lower hanger rods draw the bottom brackets upward against the door. Rubber isolators seat between the supplied brackets and the door edge.
This listing is the aluminum ladder with a clear anodized finish. Prime Design’s manual describes a Bright Dip Anodize process intended to protect the aluminum against corrosion, scratching and fading; it also calls for cleaning to maintain that finish after exposure to road film, mud, snow, ice and salt.
Vertical adjustment
The assembly manual uses a torpedo level to set the ladder vertically before the lower brackets are tightened.
Retained adjustment hardware
The manual instructs installers to remove and retain the hanger-rod hardware after installation for future adjustments.
Manufacturer-listed fitment & checks
Vehicle fitment
As listed by Prime Design
- 2015+ Ford Transit · High roof [H3], as listed on the assembly manual cover.
Backup camera
Relocation of the OEM backup camera may be required if the ladder is in its field of view.
Close and latch the door
Before using the ladder, securely close and latch the vehicle door at both top and bottom. Do not drive with the rear door open or while anyone is using the ladder.
Hand tools only
Do not use power tools to tighten fasteners. Overtightening the hanger-rod nuts may cause the brackets to damage the door skin.
Climbing precautions
Face the ladder and maintain three-point contact: two feet and one hand, or one foot and two hands. Keep hands and arms free; do not carry tools or equipment in hand while climbing. Secure hand tools in a pouch holster, tool belt or similar carrier. Use safe alternative methods to handle materials and supplies. Never jump from or slide down more than one rung or step at a time.
Grip and weather
Do not climb with greasy or slippery hands or gloves. Keep the ladder and footwear free of oil, grease and slippery substances. Avoid use during high winds or storms; clear ice, frost and snow before use.
User limitations
Prime Design says users who are prone to fatigue, have fainting or other physical limitations, take medication that may cause physical impairment, or have another condition preventing safe climbing must not use the ladder.
Fastener and condition checks
Check and retorque mounting fasteners after the first week of service, then monthly. Inspect for corrosion and deterioration every six (6) months, or more often as exposure and conditions require, including rungs, side rails, brackets, fasteners, rubber isolators and rivets. Verify the ladder retains its specified position and readjust if necessary.
Remove unsafe ladders from service
Do not use the ladder with missing, loose or damaged mountings, fasteners or hardware until corrected. Hazardous structural damage requires removal from service and repair by a competent person or removal and/or destruction to prevent use. Use OEM replacement materials and OEM-approved safety labels; keep records of inspections, maintenance and repairs.
Door mounting
The ladder is designed for one specific position on the vehicle. Prime Design warns that attachment may be compromised if it is installed elsewhere.
OEM parts
Use only OEM-supplied parts; do not add material such as rubber or plastic between the door brackets and vehicle body unless supplied with the ladder.
Specs, parts & installation
Construction & finish
| Material | Aluminum |
|---|---|
| Finish | Clear anodized; the manual describes a Bright Dip Anodize process |
Maker page data
| Listed weight | 19 kg |
|---|---|
| Listed dimensions | 4 × 16 × 79 cm |
What’s in the box
Ladder
One clear-anodized access ladder.
Door mounting assemblies
One upper mounting bracket assembly (left/right pair), one bottom hanger bracket set (left/right pair), and one lower mounting bracket assembly (pair).
Hanger bracket hardware kit
Eight M8 x 20MM bolts, eight 5/16” flat washers and eight lock washers, as listed in the assembly manual.
Installation at a glance
Assemble and mount with hand tools, following the matching Prime Design assembly manual.
Hang the upper door brackets over the door edge with the rubber isolators fully seated; use the lower hanger rods to secure the bottom brackets. Prime Design recommends positioning the vehicle on ground as level as possible.
Tighten the lower hanger-rod nuts until the bracket rubber isolators begin to compress; tighten the door-bracket bolts until snug. The guide specifies 90 in-lb for the upper and lower mounting-bracket bolts and 90 in-lbs for the lower hanger-rod clamp bolts.
Tools listed in the assembly manual
- Torque wrench with 13MM socket
- Ratchet with 13MM socket
- 13MM combination wrench
- Torpedo level
- Tape measure
- Grease or wax pencil
Finish care from the manual
- Clean with mild soap and water; use automotive aluminum cleaners and polishes for stubborn contaminants.
- Do not use harsh chemical, aggressive alkaline or acid cleaners, or excessive abrasive rubbing.
- Do not use strong cleaners on glass or nearby components where they can contact the aluminum. If contact occurs, immediately wash the ladder.
Source notes
- On page 6 of Prime Design’s assembly manual, step 4.1 says to measure horizontally outward approximately 4.00” from the inner door seam; step 4.2 says to mark the top and bottom at 3-⅛”. The manual gives two different mounting offsets; neither measurement is repeated in the installation summary.
Lead Time
Built-to-order racks typically take about two weeks to manufacture, partially assemble, and ship; actual lead time varies.
Read Prime Design lead time policy on WNDR BuiltWarranty
Read Prime Design warranty policy on WNDR BuiltReturns
Read Prime Design returns policy on WNDR BuiltWhat are people saying?
Find owner feedback, discussions, and installation videos for this product.
Searches use the manufacturer and product name and open in a new tab. Results may include similar products.
WNDR Built Community
Our community blog is coming in the future.
Community · Coming soon