
 A-Z Covers
Promaster Van Side Door Insect Screen
Indexed listing. WNDR Built doesn't sell this product; the button opens a-zcovers.com.
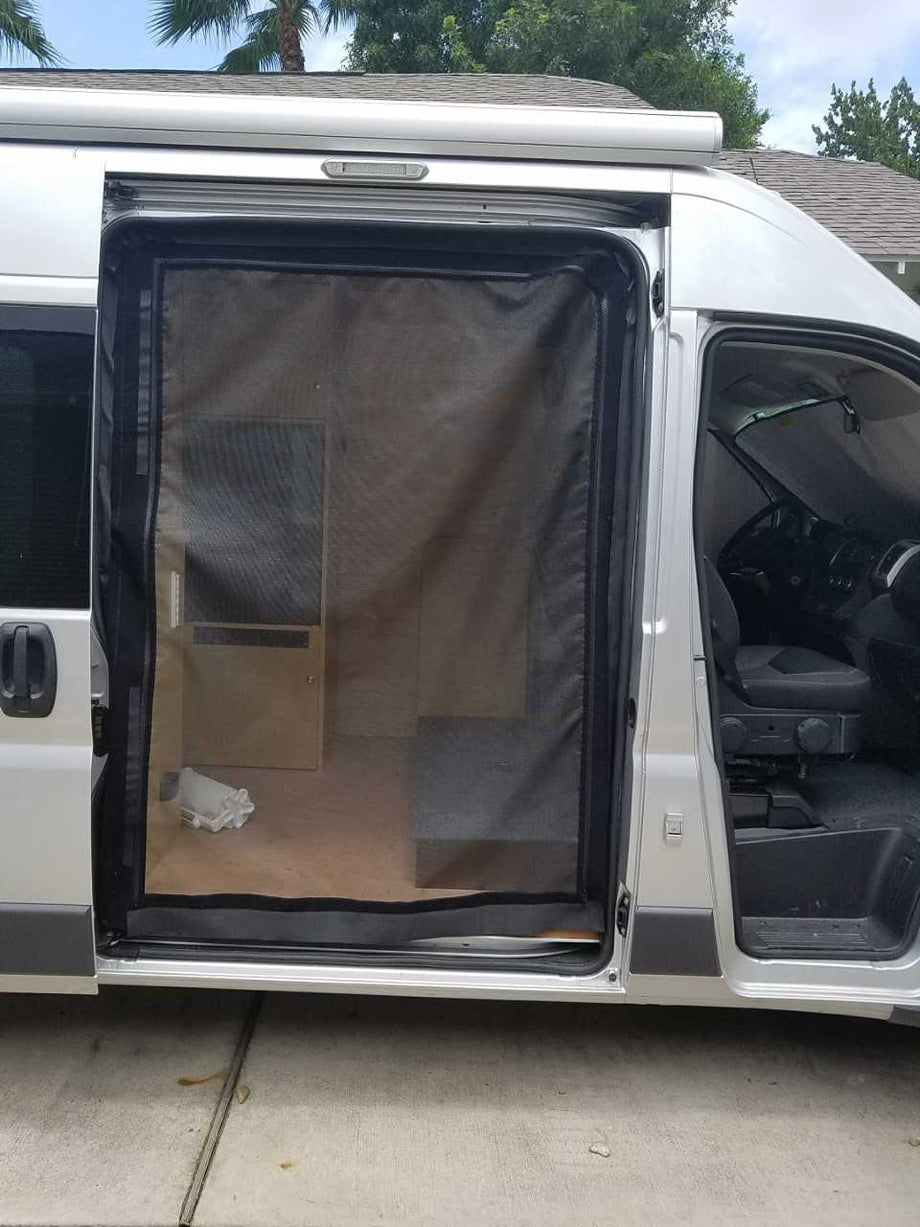
A zip-open screen for the sliding door
This sliding-door screen opens with a zipper from the bottom right to provide access through the screened entrance. When loading or unloading, the screen can roll to the left out of the doorway. The sliding door can still close while the screen is installed.
Choose Standard Screen for the seller’s high-airflow mesh, or No-see-um Screen for the smallest insects. This listing is the zippered screen; the product page directs buyers to a separate product for a magnetic opening.
Adjustable bottom sweep
Velcro adjustment positions the sweep along the bottom edge.
Removable attachment
The Velcro attachment system lets the screen be removed for seasonal storage.
Manufacturer-listed fitment & checks
Vehicle fitment
As listed by A-Z Covers
- Promaster sliding door · 2014 and up.
- Roof Height and Wheel Base options: High Roof; Low Roof 136" and 159" wb; Low Roof 118" wb.
Choose the mesh
Both mesh options are offered for all three listed roof-height and wheelbase selections.
2014 and up Standard Screen
- High-airflow mesh.
2014 and up No-see-um Screen
- Mesh for the smallest insects.
RV cabinet interference
Some RV models may have cabinet interference requiring custom modification to the border material near cabinets and/or additional installation time.
Hook-tape trimming
The linked guide says the tape corners need about 3 cuts to lie flat around the corners.
California warning
WARNING: Cancer and Reproductive Harm - www.p65warnings.ca.gov
Installer recommendation
The linked A-Z Covers guide recommends a reputable independent auto body or installation shop if you are not comfortable working on the vehicle body and door gaskets.
Specs, parts & installation
Manufacture
| Made by | A-Z Covers LLC |
|---|---|
| Country of manufacture | USA |
What’s in the box
Screen kit & instructions
Selected sliding-door screen kit with stitched border material and installation instructions.
Installation at a glance
The linked A-Z Covers guide says a screen should be installed in an hour.
Remove the factory door gasket, clean its flange, attach the loop and hook Velcro, reinstall the gasket over the tape, then attach the screen and align its sweep to the floor.
The product page specifies using the factory rubber molding and the screen kit’s stitched border material. Instructions and technical support are provided.
Installation sequence in the linked guide
- Remove the factory door gasket from the floor on one side to the floor on the other side.
- Clean the inside of the gasket flange with rubbing alcohol or adhesive remover.
- Apply the ½” adhesive-backed loop Velcro to the inside of the flange and press firmly.
- Attach the 2” hook Velcro to the loop tape; the guide specifies 3” for passenger-van sliding doors only and 2” for all rear doors.
- Reinstall the gasket over both pieces of Velcro, keeping the hook flap inside the van and taking care not to separate the tapes.
- Starting at the top corners, attach the screen to the hook flap and align the sweep to the floor.
Lead Time
Items ship as available; manufacturing or shipping delays may occur; customers pay applicable fees and duties.
This product
The product page states this special-order item takes 2-4 days to have ready.
Warranty
Manufacturer warranties only; seller disclaims its own warranty.
This product
The product page states a one-year manufacturer's warranty against manufacturer's defects.
Returns
30-day returns for unused, originally packaged items; sale items and overseas orders excluded; 25% restocking fee may apply; cancellations incur 12%.
This product
The product page states this special-order item is non-returnable.
What are people saying?
Find owner feedback, discussions, and installation videos for this product.
Searches use the manufacturer and product name and open in a new tab. Results may include similar products.
WNDR Built Community
Our community blog is coming in the future.
Community · Coming soon