
 RB Components
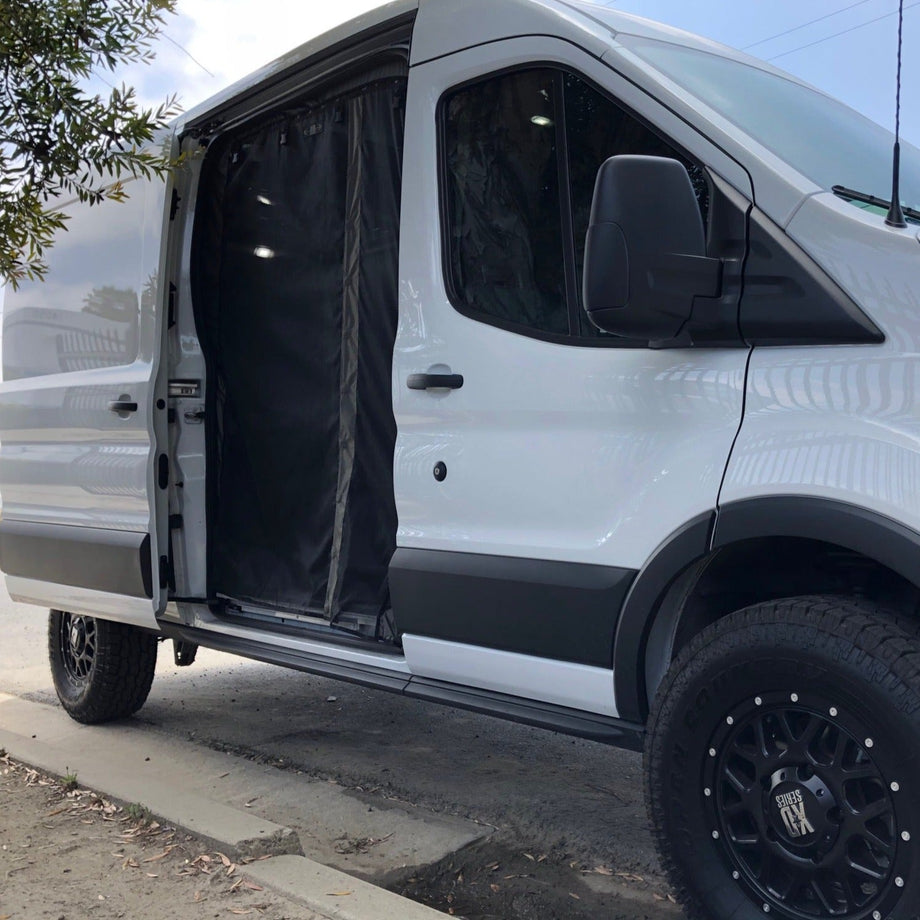
2014+ Transit Van Passenger Side Sliding Door Bug Net (for Mid & High Roof vans)
Indexed listing. WNDR Built doesn't sell this product; the button opens rbcomponents.com.
A sliding-door screen with a magnetic walk-through
This mesh screen lets you keep the sliding door open for fresh air while screening the doorway against bugs. Its center pass-through closes with magnets after you walk through; either side can also be unzipped.
The screen is separate from its fabric mounting frame. The frame tucks behind the sliding door’s rubber seal, and the screen zips into it, rather than being fixed directly to the door opening.
Roll-up loading access
Roll the screen up and hold it with the clips at the top when loading the van.
Close the door with the net installed
The sliding door closes without removing or rolling up the net.
Manufacturer-listed fitment & checks
Vehicle fitment
As listed by RB Components
2014+ Ford Transit; mid and high roof vans; passenger-side sliding door.
Screen tension
If the magnets do not close on their own, the screen is too tight; adjust the frame so the screen hangs loose enough to meet in the center.
Specs, parts & installation
Screen & construction
| Material | Mesh with a fabric mounting frame |
|---|---|
| Entry | Magnetic center pass-through and zippered sides |
| Made in | U.S.A. |
What’s in the box
Screen assembly
1 sliding door bug net, comprising an outer frame and zip-in screen.
Installation clips
5 fabric locking clips to hold the top of the frame during installation.
Installation at a glance
RB Components lists about 30–40 minutes for Transit installation; a second person helps when setting the top of the frame.
Read every step before starting. No drilling is needed.
For Transit, use a rag and acetone to clean the factory grease from the rubber seal before installing the frame.
Unzip the screen from the frame first. Peel back only the top of the seal until the top of the frame is in place; do not pull the whole seal off.
Frame and screen installation sequence
- Center the frame with its corners evenly spaced and zippers facing inside the van; use the fabric locking clips across the top.
- Starting on the right, tuck about 3/4"–1" of frame fabric between the seal and van body, pressing the seal back in place from right to left.
- Fit the right side, then work down the left side in 12" sections, tucking the fabric behind the seal.
- Zip the screen to the top of the frame first, then zip both sides. Adjust the fit as needed.
Lead Time
Read RB Components lead time policy on WNDR BuiltWarranty
Read RB Components warranty policy on WNDR BuiltReturns
Unused returns within 30 days of purchase; 10% restocking and customer-paid shipping; postmark within 30 days after approval.
Read RB Components returns policy on WNDR BuiltWhat are people saying?
Find owner feedback, discussions, and installation videos for this product.
Searches use the manufacturer and product name and open in a new tab. Results may include similar products.
WNDR Built Community
Our community blog is coming in the future.
Community · Coming soon