
 Van Essentials
Ram Promaster Bug Screen Bundle
Indexed listing. WNDR Built doesn't sell this product; the button opens vanessential.com.
Doorway screening with two rear-panel styles
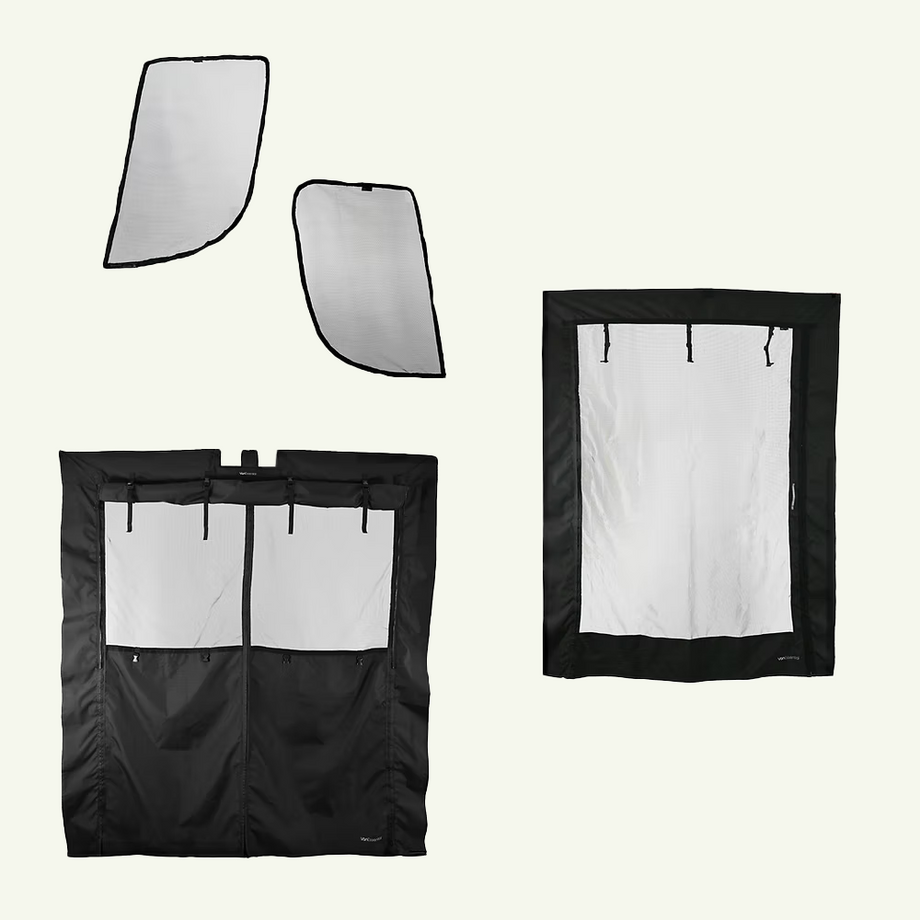
These bug-screen bundles place NoSeeUm micromesh across the van’s door openings for use with the doors open. VanEssential describes the transparent mesh as a barrier to pests that preserves the view outdoors.
The rear-screen choice changes how the doorway is screened: Full Mesh keeps an all-mesh panel, while Half Mesh with Privacy Panel uses fabric across the lower section for privacy. The latter also has a top flap that can be used as an awning for sun and rain protection, according to VanEssential.
Roll-up storage
Zippers and quick-release buckles let you roll the screens up and clip them out of the doorway.
Sliding-door access
The sliding door screen has an integrated grab handle; its installation guide describes a magnetic closure.
Manufacturer-listed fitment & checks
Vehicle fitment
As listed by Van Essentials
Ram Promaster high roof 136 and 159 length vans only.
Choose your bundle
Both bundles include the sliding door screen, rear door screen and installation hardware kit.
FULL BUNDLE (Front Doors/Sliding Door/Rear Door)
- Also includes a pair of front door bug screens.
BIG DOOR BUNDLE (Sliding Door/Rear Door)
- Sliding and rear door screens without the front door pair.
Choose your rear screen
Both rear-screen styles are offered with either bundle.
Full Mesh
- All-mesh screen with a center zipper closure.
Half Mesh with Privacy Panel
- Mesh on the top half; black fabric on the bottom half for privacy.
- Top flap rolls up for ventilation or clips to the rear doors as a sunshade.
Automatic sliding doors excluded
Sliding door bug screens are not compatible with electric / automatic sliding doors.
Front screens and wind deflectors
The front door bug screens in the Full Bundle will not fit with wind deflectors on the outside of the van.
Fabric trimming required
The sliding-door and rear-door manuals instruct trimming excess screen fabric after checking the fit.
B-pillar access
Sliding-door installation requires removing and reinstalling the B-pillar plastic cover on the right-hand side of the door frame to reach the weatherstrip; the guide lists a drill.
Installer assistance
VanEssential recommends contacting a local van builder if you are not comfortable installing the screen yourself.
Specs, parts & installation
Screen materials
| Fabric | Recycled UV resistant materials |
|---|---|
| Mesh | Transparent No-See-Um micromesh |
What’s in the box
Full Bundle
- 1 pair of front door bug screens
- 1 sliding door bug screen
- 1 rear door bug screen
- 1 installation hardware kit
Big Door Bundle
- 1 sliding door bug screen
- 1 rear door bug screen
- 1 installation hardware kit
Manual-listed installation parts
Each sliding-door and rear-door manual lists 2 spring clamps, 50 small metal clips and 50 large metal clips for that screen.
Installation at a glance
The rear-door and sliding-door guides each estimate 60-90 Minutes and call for a helper.
Fit the rear and sliding screens under the door weatherstrip using the supplied metal clips. Clean off grease beneath the weatherstrip before fitting the fabric.
Leave plenty of slack to avoid tension on the weatherstrip and allow the rear zipper and sliding-door magnetic closure to work; roll up the screen and check that the door opens and closes before trimming excess fabric.
Full Bundle front door screens fit on the outside of the front doors, not under the weatherstrip.
At the sliding door, the screen’s bottom rests against the step and is not tucked under the weatherstrip.
At the rear door, fit the top cutouts around the metal door latches; the flap between them attaches magnetically, with the weatherstrip and latches left in place in that section.
Tools listed in the rear and sliding-door guides
- Sharp blade
- Step ladder
- Helper
- Drill for sliding-door installation
Weatherstrip fitting sequence
- Hold the screen with its buckles and logo facing out; clamp the upper corners in place.
- Work in small 12” sections, feeding fabric under the weatherstrip and fitting the metal clips.
- Use the clip size that fits the frame, use as many clips as possible for a secure fit, and squeeze the weatherstrip closed before reinstalling it over fabric and clips.
Front door screens — Full Bundle
- Start with the driver’s door; keep the “Left Side” tag facing out and the VanEssential tag facing out in line with the door handle.
- Place the sharp corner down by the door mirror, stretch and adjust the screen edges for fit, then repeat on the passenger side.
Lead Time
Orders generally ship next business day via UPS Ground; free-shipping thresholds vary by page, and the Support FAQ states two Canadian duty/customs fees.
Read Van Essentials lead time policy on WNDR BuiltWarranty
Maker's FAQ and returns page: lifetime workmanship warranty for the original purchaser; see the brand page for the full terms.
Read Van Essentials warranty policy on WNDR BuiltReturns
Returns within 30 days of shipment require authorization and unused/original packaging; customer-paid shipping except VanEssential error; no international or closeout returns; 20% restocking if condition requirements fail.
Read Van Essentials returns policy on WNDR BuiltWhat are people saying?
Find owner feedback, discussions, and installation videos for this product.
Searches use the manufacturer and product name and open in a new tab. Results may include similar products.
WNDR Built Community
Our community blog is coming in the future.
Community · Coming soon