
 The BugWall
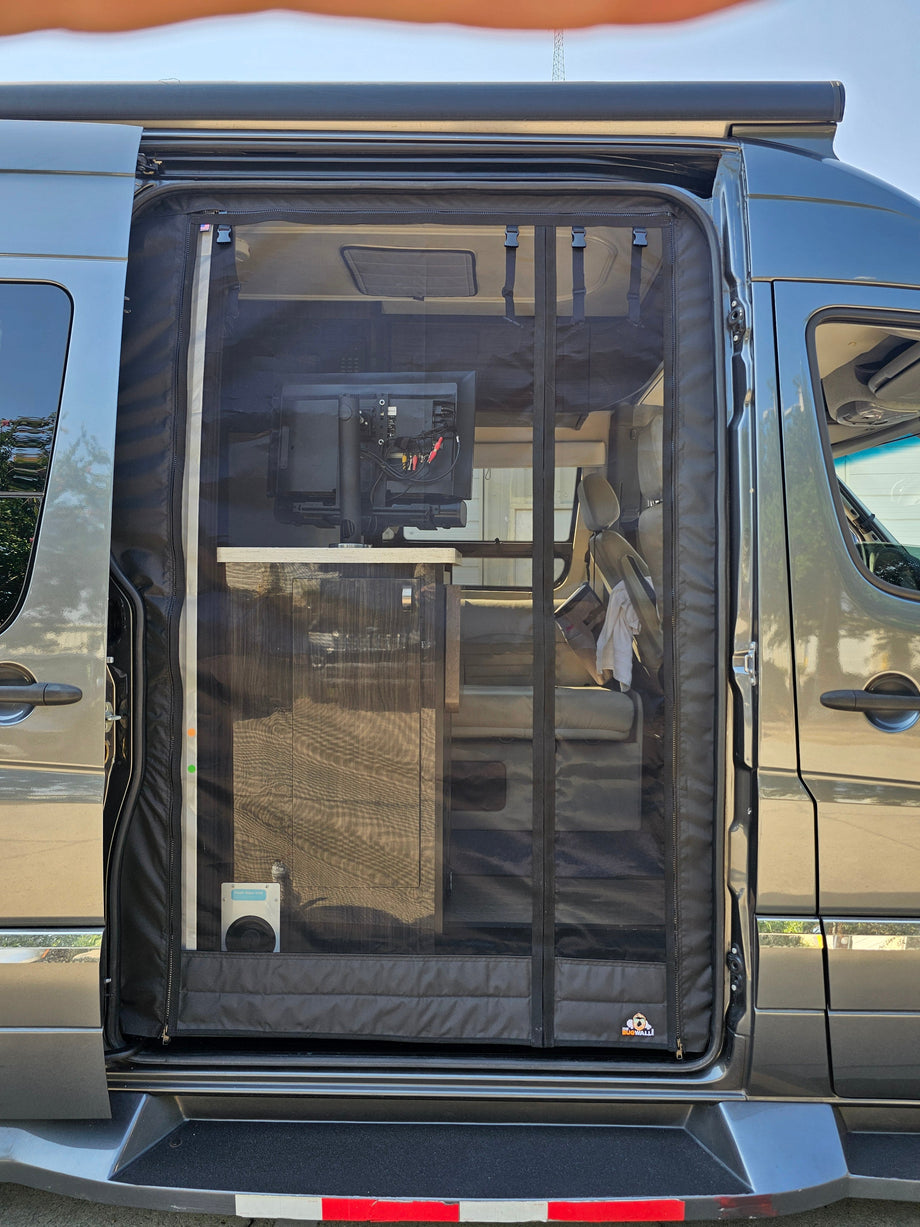
2025+ Mercedes Sprinter Side Sliding Door Insect Screen with New Door Latch
Indexed listing. WNDR Built doesn't sell this product; the button opens thebugwall.com.
A sliding-door screen with a handle pass-through
The BugWall lists a side sliding door insect screen for Mercedes Sprinter vans with the newer sliding door latch. Velcro flap passes the interior door handle through the screen, so the door can close with the screen down. When the screen is rolled up, the flap can be opened and velcroed out of the way of the door handle.
Zippers on both sides let the screen roll up; rolled flaps are secured with built-in buckle straps. Closure choice: magnetic closure for walking in and out, or a zipper in the center.
Weighted lower edge
Foam along the bottom adds weight for a better roll-up (listed as new for Bug Wall V2).
Screen materials
No-See-Um bug netting on marine canvas.
Removable screen
Zipper across the top lets you remove the rolled-up screen for seasons when insect protection is not required (listed as new for Bug Wall V2).
Manufacturer-listed fitment & checks
Vehicle fitment
As listed by The BugWall
2025+ Mercedes Sprinter models with the new latch on the interior of the side sliding door · High or Low roof
Choose your roof height
Choose the option matching the van's roof height.
High
- High roof
Low
- Low roof
Choose your entry location
Choose where you usually walk in and out; if cabinetry makes you use the front of the opening, choose the front option.
Center
- Entry at the center of the screen.
Opening closer to FRONT of Van
- Opening closer to the front; the maker places the magnet/zipper opening approx. 14" from the edge of the door opening.
Opening closer to REAR of Van
- Opening closer to the rear; the maker places the magnet/zipper opening approx. 14" from the edge of the door opening.
Choose your opening type
Magnet and Zipper are offered at every listed opening location and roof height.
Magnet
- Magnetic closure for walking in and out.
Zipper
- Zipper entry; the description calls it centered, while the offset-option text explicitly locates the magnet/zipper opening near the front or rear.
Confirm the sliding-door latch
Check the maker's product pictures: some 2025 Sprinters do not have the new latch. This latch requires an interior-handle pass-through; the maker directs buyers without this latch/handle type to its 2007-2024 screen instead.
Handle flap
Open the velcro flap so the handle can pass through when closing the door with the screen down. With the screen rolled up, open the flap and velcro it out of the handle's way using the supplied velcro on the B pillar.
Electric sliding doors
The BugWall does not recommend its installation method on Sprinter electric sliding doors; an alternative attachment method is needed.
Trim before closing the sliding door
The installation guide says not to shut the sliding door with excess screen material untrimmed, because it could get caught.
Magnetic-screen tension
Too much side-to-side tension prevents the magnet strip from operating correctly; do not install a magnetic-closing screen too tight.
Weather-seal clearance
Leave enough fabric behind the flange and upper corners for the weather seal to seat fully. Pinch the weather seal shut before reinstalling it.
Trapped weather seal
If the weather seal is trapped behind cabinetry or other parts and cannot be removed, follow the trapped-seal video and any supplemental instructions supplied with the screen.
Separate rear screens
Rear screens are available separately in two options.
Specs, parts & installation
Materials & manufacture
| Materials | US made marine canvas with No-See-Um bug netting and USA made marine grade zippers. The BugWall states the screen is UV stable. |
|---|---|
| Manufacture | The BugWall states it manufactures its screens in Conway, SC. |
What’s in the box
Screen & roll-up straps
Insect screen with built-in buckle straps for securing rolled-up flaps.
Installation supplies
Roll of double-sided tape and clips supplied with the screen, as described in the brand-wide installation guide.
Package extra
Bugwall coozie (the installation guide says one was included in the package).
Handle-flap attachment
Velcro to install on the B pillar (the product page says it is supplied).
Installation at a glance
Installs around the side door-opening flange with double-sided tape and clips beneath the weather seal.
Check left/right position and length: the left zipper must not interfere with the weather seal on the left side. At the top, center the screen between the weather-seal bump-out and the right door edge, rather than the entire opening. Align the side-screen guideline with the flange edge so the bottom hangs in front of the step/floor; do not position it lower. Raise it above the guideline if you want it at or just above floor level.
Follow the updated written guide; the older videos are visual guides, and any supplemental instructions supplied with the screen also apply.
Installation sequence from the brand-wide guide
- Mark the weather seal and van so the seal can return to the same left-to-right position; remove the seal across the top and clean the flange with alcohol or water.
- Apply the double-sided tape across the top and around both corners, starting and ending just below the corners, ideally with half on each side of the flange; remove the red cover.
- Press the screen fabric onto the tape on the front and back of the flange, leaving room behind it for the seal.
- Use the thick supplied clips across the top. Start with one in the center and one toward each side, check the length before adding more because clips are difficult to remove, then place a clip about every 6-8" across the top.
- Wrap the fabric around the corners and down the sides, using clips suited to the metal thickness. Relief cuts in the screen material may help it follow the left-side bump-out; keep the zippers straight.
- After confirming placement, trim excess fabric. The guide recommends scissors; a razor is an alternative but is more likely to scratch the van.
- Pinch the weather seal shut, reinstall it using the reference mark, and use a mallet to seat it fully, especially in the corners.
Screens without a guideline
- For an older or rare model without a guideline, initially hang it about an inch too long; wrapping fabric behind the flange, installing clips and reinstalling the seal raises it about an inch.
Tools and supplies named in the guide
- Marker; alcohol or water for cleaning; a small hammer or mallet for the clips and seal; scissors (recommended) or a razor for trimming.
Lead Time
Lead times vary; contact the maker. Product banner: about 1 week to shipment for new orders; international taxes, fees, duties and tariffs are the buyer’s responsibility.
This product
The maker's product-page banner estimates 1 week until shipment from the shop for new orders due to high demand.
Warranty
Read The BugWall warranty policy on WNDR BuiltReturns
Returns within 30 days; later returns incur a 25% fee and are not accepted after 90 days.
Read The BugWall returns policy on WNDR BuiltWhat are people saying?
Find owner feedback, discussions, and installation videos for this product.
Searches use the manufacturer and product name and open in a new tab. Results may include similar products.
WNDR Built Community
Our community blog is coming in the future.
Community · Coming soon